How to Sight In Your AGM Rattler Thermal Scope
Struggling to get your AGM Rattler thermal scope zeroed in? It’s a key step to ensure accurate shots and effective use at night or in low visibility.
With a straightforward process, you can quickly set your scope for precise targeting.
Keep reading, and I’ll walk you through the simple steps to get your scope dialed in and ready to go.
Mount and Power On Your AGM Rattler Before Zeroing
To properly mount and power on your AGM Rattler thermal scope before zeroing, follow these steps. First, attach the mount to the scope body and tighten its fixing screws to 4–5.3 Nm using Loctite for added retention. This ensures mount stability by preventing shift during recoil. Next, release the clamp lever, place the scope on your Picatinny rail so that the stop engages a slot, and lock the lever securely. Confirm the clamp holds tightly; any movement can jeopardize scope calibration. A cantilever scope mount provides forward mounting clearance for proper eye relief on a rifle. Then, adjust the scope to be level with your shooting stance. Proper alignment reduces the need for re-adjustments later. Also, ensure you familiarize yourself with basic thermal controls to manage brightness and contrast before zeroing. While adjusting, consider how top thermal binoculars for hunting offer similar precision in target detection. Finally, press and hold the power button until the AGM logo appears. Always make sure the mount is secure before powering on the scope to maintain calibration accuracy.
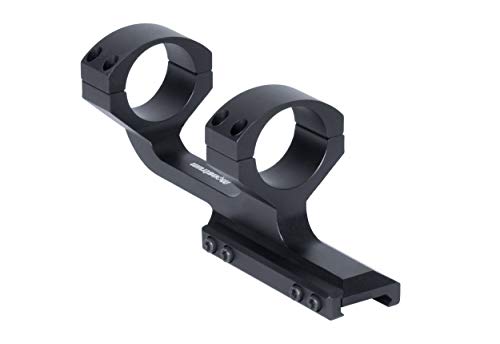
Dual ring scope mount available for both standard 1 inch and standard 30mm tube rifle scopes

Transform your rifle in an instant! With the Monstrum Hypergrip Series QD Scope Mount, you can quickly swap out your optic to meet the needs of any situation.

All new rigid unibody design with strategically placed lightening cuts to reduce weight
Set up Your Target: Start at 20 Yards With a High-Contrast Mark
Start at 20 yards with a high-contrast mark for initial zeroing. This close distance makes impacts easy to see and allows you to make quick corrections. Use a bright center mark, like aluminum tape, to maximize contrast against the background, ensuring your reticle remains clearly visible under thermal viewing. Always check your backstop safety by using a large covered area with paper to contain wild shots. Starting at this short range confirms bore alignment efficiently, saving time from walking back and forth. Because impacts are visible, adjustments become smoother. Keep your aiming point bright and free of clutter to avoid guessing where your bullet landed. Once the first shot is verified, you can proceed confidently with more precise zeroing. For consistent mounting repeatability, always return the scope to the same initial position after adjustments. A thermal imager works by detecting infrared radiation emitted by objects rather than ambient light. Building your own thermal drone can provide a versatile platform for testing different mount heights and stability configurations. For military users, features like automatic gain control are critical for adapting to rapidly changing thermal environments.
Set Your Zeroing Profile and Distance Before Firing
Set your zeroing profile and distance before firing. Choose a profile like A1-50m that matches your intended zero range. Each profile stores zero data tied to a specific distance, so you can set different profiles for different calibers or ranges. For example, create one profile for 5.56 75-grain ammo at 100 meters and another for .223 55-grain at 50 yards. This ensures your settings don’t overwrite each other when switching between configurations. Accessing the main menu requires a long press of the menu button to begin selection. Just as you would secure your trail camera with a trail camera lock to prevent theft, your scope profile must be locked in to ensure accuracy. Be aware that certain optical enhancements, like red night vision goggles, were banned due to their potential to distort target identification in low-light conditions, which underscores the importance of relying on your thermal scope’s calibrated settings instead. This process is similar to using quick connect on Stealth Cam devices, which simplifies pairing your scope with its app for profile management.
Before shooting, check the active profile indicator in the upper-right corner of the display. Confirm that your reticle type and color are saved correctly to that profile. Using the wrong profile causes your hold point to be off, which can greatly affect accuracy. Always match your current setup to the correct zeroing profile to maintain precise aim.

Ultra Sensitive Thermal Sensor: cutting-edge thermal scope the ThOR LTV delivers an ultra clear visual with its 12 micron sensor and 60Hz refresh rate, providing a distortion free image

Short-to-Mid-Range Hunting Thermal Sensor: High-sensitivity 256x192, 12μm sensor with NETD ≤50mK. Features 50Hz refresh rate and 1024x768 OLED display for smooth real-time tracking and sharp contrast in total darkness
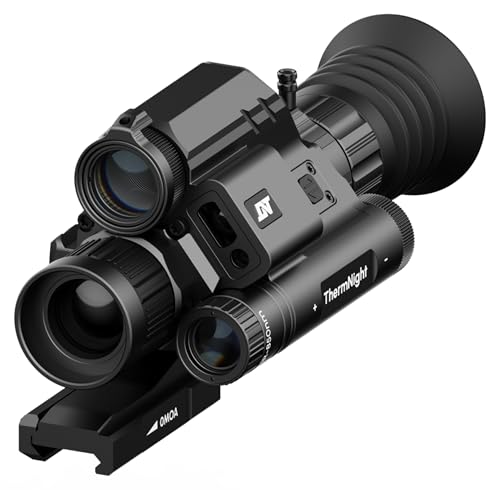
Advanced Thermal & Night Vision Technology: Equipped with a 640 x 512 thermal sensor and Sony Starvis 2 digital sensor, the ThermNight delivers high-definition thermal and night vision images. Switch seamlessly between thermal imaging and digital night vision with a simple button press. The 60Hz 1920x1080 Micro-OLED display ensures clear images in both daylight and darkness
Use Freeze Screen to Correct Your Reticle to the Impact Point
After your shot lands, freeze the thermal image to adjust the reticle against a still frame. This prevents image flutter, so you can clearly see the impact point. You’ll notice two crosshairs: the large reticle and a small reference. To fine-tune the reticle, go to the X and Y menu. Use the directional buttons to move the large reticle directly onto your bullet’s impact point. Hold a button to speed up the movement, especially during larger adjustments. Increasing the magnification allows for more precise alignment. This step is your primary impact verification before saving the setting. When the reticle is exactly on the bullet hole, you’re ready to move on. Don’t skip this step because it simplifies the entire zeroing process. This frame-freeze technique is a core part of the AGM Oneshoot Zero Feature, enabling quick reticle correction without needing to reshoot. Similar to assembling a DIY night vision camera, building your thermal setup requires careful part selection and solid mounting to maintain accuracy. Similar functionality is now found on top crossbows with night vision scopes for verifying shot placement in low light. Adding a weatherproof security box around your thermal scope protects the delicate electronics and lens during field use.

Fast Targeting. Wide Field of View: The RattlerV2 19-256 offers a 2.5x base magnification and a wider field of view — ideal for close- to mid-range scanning and fast-moving targets. Whether you’re hunting hogs in thick brush or predators on the move, this thermal scope keeps your target in sight and your response time sharp.
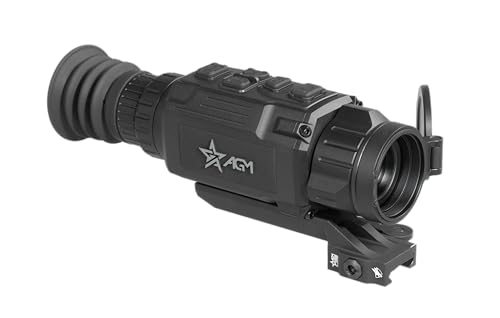
Pinpoint Clarity in the Dark A 384×288 12μm sensor with sub-15mK sensitivity delivers crisp thermal imaging, letting you spot coyotes, hogs, or predators even in pitch-black fields and foggy terrain.

Extended Range. Wider Opportunity: With a 25mm Germanium lens and a powerful 3.5x base magnification, the RattlerV2 25-256 gives hunters a serious edge. Its thermal imaging scope lets you detect heat signatures out to 1,250 yards.
Save Your Zero and Verify With a Follow-Up Shot
Return to normal thermal view and disable the freeze function before verifying your zero. Take a follow-up shot at your original target to confirm that your zero still holds. If the impact drifts from the expected point, reopen the zeroing menu, make adjustments, and resave the profile. Repeat this process until your shot group tightens and the impact stays consistent. Remember, the saved profile remains active, so each follow-up shot builds on your most recent correction, ensuring ongoing accuracy. Using thermal imaging to verify shot placement during group testing helps confirm whether the three-round groups are tight and properly positioned. Unlike traditional night vision, thermal scopes detect heat signatures to create a clear image even in total darkness. When deciding between these tools, consider that thermal imaging excels at penetrating fog, smoke, and heavy brush, while night vision relies on ambient light and can be blinded by bright flashes. Understanding the cost of trail cameras helps you allocate your budget for accessories like extra batteries or mounting hardware.