What Is a Thermal Imager and How Does It Work?
Ever wonder how you can see heat that’s invisible to the naked eye? A thermal imager turns warmth into visible images, revealing heat signatures even in complete darkness or through smoke.
It works by detecting infrared radiation emitted by objects and translating it into colors you can interpret easily.
Keep reading to learn how this technology is changing safety, medicine, and more.
What Is a Thermal Imager?
A thermal imager is a device that detects infrared energy, or heat, emitted by objects and converts it into a visible image called a thermogram. It enables you to see heat signatures that are invisible to the naked eye and works effectively in complete darkness. The imager captures temperature differences between an object and its background, allowing you to identify issues such as energy leaks, electrical faults, or overheating components. Its core component is a thermal sensor known as a microbolometer array, where each pixel measures temperature with high precision. This sensor’s durability ensures reliable performance even in demanding environments. The technology behind this relies on detecting infrared wavelengths in the electromagnetic spectrum. Since it detects emitted heat rather than reflected light, you can perform inspections without physical contact, making it an energy-efficient and safe assessment tool. Additionally, thermal imagers provide real-time thermal monitoring regardless of visible light conditions. A key distinction is that thermal imaging detects emitted infrared radiation rather than amplifying available light like night vision technology.
The Core Principle of a Thermal Imager: Seeing Infrared Heat
Every object you encounter emits invisible infrared heat because its temperature exceeds absolute zero. This emission occurs passively, without any light input. The principles behind this emission are rooted in thermodynamics; hotter objects radiate more intense infrared energy. Because this energy lies in longer infrared wavelengths, your eyes cannot detect it directly. Each object, from your skin to a cold wall, has a unique thermal signature based on its temperature and material’s emissivity. A thermal imager functions by passively detecting these natural emissions, allowing you to see heat without illumination. It works in complete darkness or through obscurants like smoke, sensing the heat that objects naturally emit.
How Does a Thermal Camera Capture an Image?
A thermal camera captures an image by focusing invisible infrared heat onto a specialized sensor array through its lenses. Germanium lenses are commonly used because they effectively transmit specific infrared wavelengths, ensuring high-quality data collection. The infrared energy striking the sensor is then converted into electrical signals, with the process depending on the sensor’s thermal sensitivity—its ability to detect small temperature differences. Just like with night vision optics, the quality of core components is a major price driver.
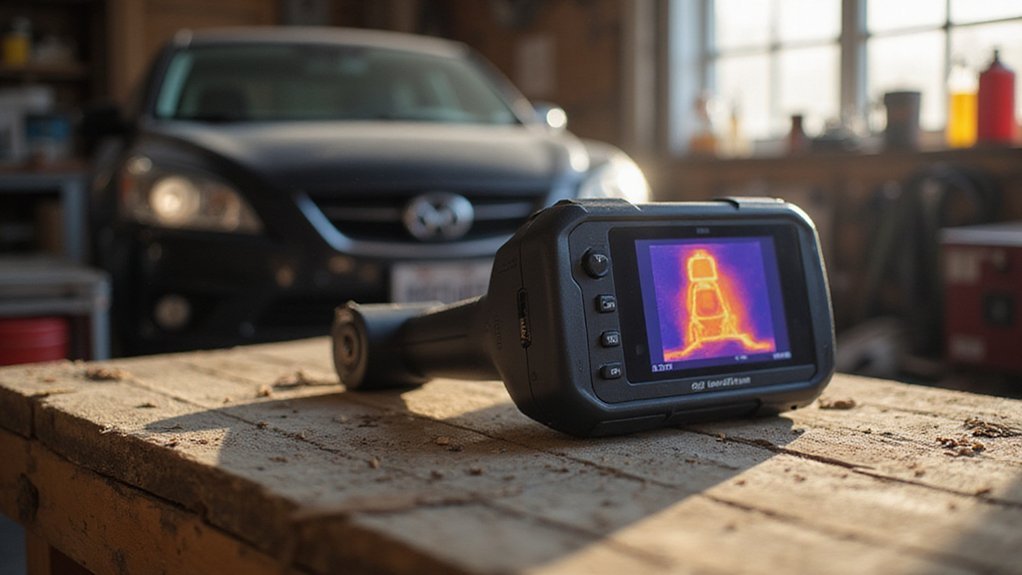
These analog signals are processed by onboard circuits that convert them into digital data, applying noise reduction techniques to minimize interference and improve image clarity. Next, the system reconstructs the thermal image by mapping the temperature data onto a visual scale. Different temperature ranges are assigned specific colors or shades of gray, creating a thermogram that clearly illustrates heat distribution. This process is known as color palette mapping, a crucial step for accurate interpretation. The final image appears on the display, providing you with a real-time visualization of the scene’s thermal profile, operating effectively in darkness unaffected by visible light.

Advanced DLC film technology enhances wear resistance and extends the service life of the germanium window.

Large 3.5" IPS Screen: The Thor001 features a large 3.5‑inch IPS screen for fast, efficient field inspections. Its industrial‑grade scratch‑resistant display maintains durability and consistent clarity under harsh field conditions. 8× digital zoom magnifies critical details, helping technicians maintain a safe working distance.

【UT-Z003 thermal imaging camera Lens Applicable models】 UTi260V/UTi260E/UTi320E/UTi320v+/UTi720E/UTi730E/UTi720V/UTi730V Thermal Camera(only applicable to UNI-T, not supported by other brands)
The Heart of the Camera: How a Microbolometer Works
The microbolometer is essentially a grid of tiny heat-sensitive pixels that form the core of an uncooled thermal camera. Each pixel contains a thermistor, such as vanadium oxide, which varies its electrical resistance with temperature changes. When infrared radiation from a scene strikes an absorber on the pixel, it heats the thermistor. Because each pixel is designed with limited thermal conductivity, heat does not easily spread to neighboring pixels, reducing crosstalk. The change in resistance is measured and correlated to temperature. To ensure consistent accuracy across the entire array, sensor calibration is performed, mapping resistance variations to precise temperature values. The entire sensor array operates at ambient temperature within a vacuum-sealed package, which eliminates the need for bulky cooling systems, making the camera compact and portable. Mastering the available thermal camera settings is crucial for capturing clear and accurate thermal images. This portability is a key reason thermal drones are popular for DIY projects. Understanding the trail camera cost factors can help when selecting the right thermal imaging device for your needs and budget.
How Raw Heat Becomes a Digital Image (Signal Processing)
Once the microbolometer grid converts heat into electrical signals, your imager’s readout circuit produces an analog voltage that corresponds to the raw thermal data. This voltage is then fed into an analog-to-digital converter (ADC), which transforms the continuous signal into a digital format. To capture subtle temperature differences accurately, the ADC uses high-bit resolution—typically 14 bits or more—preserving fine details from the infrared spectrum.
After digitization, advanced algorithms process the data by applying non-uniformity correction to compensate for sensor variations, filtering out noise to improve clarity, and interpolating bad pixels to fill in gaps. This results in a calibrated temperature map that accurately reflects the scene’s thermal profile. The final step involves mapping these temperature values to a color palette, assigning warm hues to hotter areas and cool hues to colder ones. Adjustments for contrast and sharpness are then made, assembling the polished image ready for display on your screen.

Super Resolution Enhancement: The Flagfront YXI96 thermal camera is equipped with 240x240 super-resolution imaging technology, providing clearer images and capturing more details; A high frame refresh rate of 25Hz ensures a smooth inspection experience

𝐔𝐍𝐈𝐕𝐄𝐑𝐒𝐀𝐋 𝐂𝐎𝐌𝐏𝐀𝐓𝐈𝐁𝐈𝐋𝐈𝐓𝐘: The RISION Magic thermal imager offers USB-C port that works with iOS, Android & Windows devices. Note: Mac devices are not supported.

Universal USB-C Thermal Camera for iOS Android and Windows: The AMPBANK M192 thermal imaging camera works with all USB-C smartphones tablets and USB-C smart devices running iOS Android or Windows. No adapter or battery needed simply plug into the USB-C port,download the ThermCam app,and start thermal imaging instantly. Stable OTG ensures reliable connection during home inspection electrical diagnostics and automotive repair. Note: not compatible with Mac temporarily
The Essential Hardware: Lenses, Processors, and Displays
The core hardware components of a thermal imager include lenses, processors, and displays. The lenses, often made of germanium for LWIR systems, focus infrared radiation onto the detector. These materials are chosen because they are highly transparent to infrared wavelengths, ensuring efficient capture of heat signatures. Beginners should understand that this efficient capture is the critical first step in creating a usable thermal image. The detector then converts this focused radiation into raw signals. A processor quickly processes these signals, enhancing the image in real time for clarity and detail, a function analogous to the image intensifier tube in night vision. This processed data is sent to the display, where the image becomes visible, often using a high-contrast color palette optimized for interpretation. The final level of detail depends on the display’s resolution and the number of pixels in the detector, which together determine how much detail you can interpret in the thermal scene.

★High Transparency: Germanium lenses offer exceptional infrared transparency, making them ideal for thermal imaging and thermometer applications.

[Enhanced Clarity Thermal Imaging] With a resolution of 320 x 240, which can be enhanced to 240 x 240 via TISR technology to reveal richer details. A wide field of view of 50° x 38° and a refresh rate of 25 Hz deliver accurate, smooth thermal images—ideal for detailed inspections of residential properties, electrical systems, and mechanical equipment.
★High Transparency: Germanium lenses offer exceptional infrared transparency, making them ideal for thermal imaging and thermometer applications.
How to Read the Colors on a Thermal Image
Understanding a thermal image starts with interpreting its colors accurately. Remember, these colors represent temperature ranges, not precise values. Always begin by examining the temperature scale on the color bar, which provides your main reference. Check the numbers at both ends of the scale to determine the full temperature range; for example, a blue area might indicate 68°F in one image and just 45°F in another. The specific color palette selected can drastically change how this temperature data is visualized and understood. Warmer objects usually show up as reds and yellows, while cooler areas appear in blue or black, depending on the palette chosen. Common color palipses include iron or grayscale options. Many modern wireless monitoring systems now incorporate thermal technology for real-time alerts. Use spot measurements to verify your interpretation of these colors. Pay attention to heat patterns and contrasts—like hotspots with gradual gradients—as these give more insight than isolated color patches. For accurate assessments, ensure your thermal camera settings are optimized for the specific environment and target.
How Thermal Cameras See Through Smoke and Darkness
Thermal cameras see through smoke and darkness because they detect heat instead of visible light. Infrared physics explains this: sensors capture infrared radiation, which passes through smoke gaps with less scattering than visible light. The camera converts this heat data into a clear image, allowing you to see people or hot spots like fires. This capability is vital for safety, especially for firefighters who need to navigate smoky environments and locate victims. While dense or very hot smoke can diminish image clarity, most dark or smoky conditions still allow thermal cameras to effectively detect heat signatures directly. Because no external light is needed, you gain a real-time visualization of heat patterns, displayed as visible signals on the camera’s screen. For low-light conditions where thermal isn’t available, operators often rely on night vision devices. However, thermal cameras cannot see through solid walls, as most common building materials block infrared radiation.
From Medicine to Maintenance: Common Uses for Thermal Cameras
Thermal imagers have a wide range of everyday applications beyond safety and rescue. In medicine, they are used for non-invasive diagnostics, such as detecting inflammation or poor blood flow. They can help guide pain management and monitor surgical sites for signs of infection. These medical uses operate under strict regulatory standards like those from the FDA. Originally developed from military technology, thermal cameras now assist public health by enabling quick fever screenings.
Outside healthcare, thermal imagers are vital in industrial maintenance. They help identify electrical faults or heat loss in buildings, which is essential for energy audits. These cameras provide an immediate visual map of temperature differences, making it easy to spot overheating machinery or vascular issues. Such quick assessments enable prompt action, preventing potential failures or health risks. This instant analysis is similar to the benefit provided by the quick connect feature on modern trail cameras. For discreet or hands-free monitoring in other fields, a user might employ a hands-free game camera. For extended observation in low-light conditions, modern trail cameras with night vision provide continuous, high-quality imaging.

3.5'' 640×480 IPS: This thermal imager features a 2MP visible light camera and a 3.5" 640×480 IPS display for exceptional clarity. With upgraded X³ IR technology, it boosts thermal resolution from 256×192 to 512×384. This handheld thermal camera supports a smooth 25Hz refresh rate, and offers ultra-fine 40mK sensitivity—delivering faster, more detailed inspections.

SHARPER THERMAL DETAILS — This thermal camera enhances 256×192 infrared resolution to 512×384 with NUR Super Resolution, delivering clear thermal images on the 3.5" 640×480 HD display at 25Hz for home inspection, HVAC and electrical troubleshooting

[Thermal Clarity Enhancement] Designed with a 2.8-inch 320×240 LCD screen, the HT280 thermal imaging camera displays clearer, more detailed thermal images. It enhances thermal image resolution to 260×260 using TISR technology for greater detail(Opening the TisoView in the settings will get more clear images). With a thermal sensitivity of 50 mK and a frame rate of 25 Hz, it delivers accurate, smooth images, making it an essential tool for building inspections, HVAC troubleshooting, electrical inspections, and vehicle maintenance.
How Firefighters Use Thermal Imagers in Action
Thermal imagers are essential tools for firefighters operating in zero-visibility conditions caused by thick smoke and darkness. They quickly locate unconscious victims by detecting body heat against cooler surroundings, halving search times during rescue operations. This technology also helps pinpoint the fire’s origin and identify superheated walls or structural hazards that could lead to collapse. Training emphasizes effective scanning techniques from floor to ceiling to find victims and hazards efficiently. By detecting excessive heat and adjusting sensitivity, these devices enable firefighters to apply water to cool and prevent conditions from worsening before proceeding. Understanding the core technology, such as how a thermal imaging sensor detects infrared radiation, can deepen appreciation for these lifesaving devices. Hobbyists exploring similar technology often start with affordable Thermal Cameras for Arduino to understand infrared detection principles. Ethical considerations are built into training as well, ensuring you respect privacy when interpreting heat signatures and prevent misjudgments. During overhaul phases, thermal imagers reveal hidden hot spots, helping you prevent re-ignition and making each operation faster and safer.

【Enhanced Thermal Clarity】Start with 128x128 thermal imaging and enhance to 240x240 resolution with TISR technology for greater details. The wide 40°x 30° field of view and a 25Hz refresh rate deliver accurate, smooth thermal images—ideal for detailed inspections in homes and on electrical systems and machinery
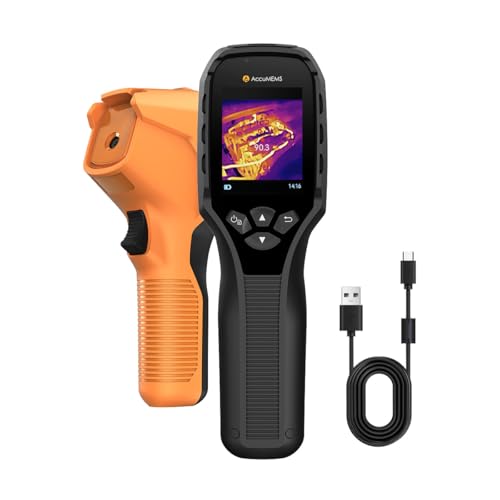
【Dual Mode Inspection】Combines thermal imaging with Center/Hot/Cold spot modes for real-time visual temperature display, and integrates thermometer mode for fast point-and-shoot readings with precise digital output. Full-screen thermal imaging enables continuous monitoring of moving targets,ensuring stable observation without loss of detail during dynamic inspections.

【Essential First Responder Tool】A thermal camera provides a unique perspective not seen with the naked eye, helping you to see through smoke, regain orientation, detect hot spots and hazards, and communicate with your team more effectively. Investing in a personal thermal imaging camera is an investment in your personal safety.