A Complete Beginner’s Guide to Thermal Scopes
Wondering how to get clear heat images in complete darkness without breaking the bank? A thermal scope uses heat signatures to help you see what’s normally impossible, and it’s easier to get started than you might think.
With the right sensor and some simple setup, you’ll be able to spot heat sources at useful distances.
Keep reading to learn how to unlock your scope’s full potential.
How a Thermal Scope Works: Detecting Heat in Total Darkness
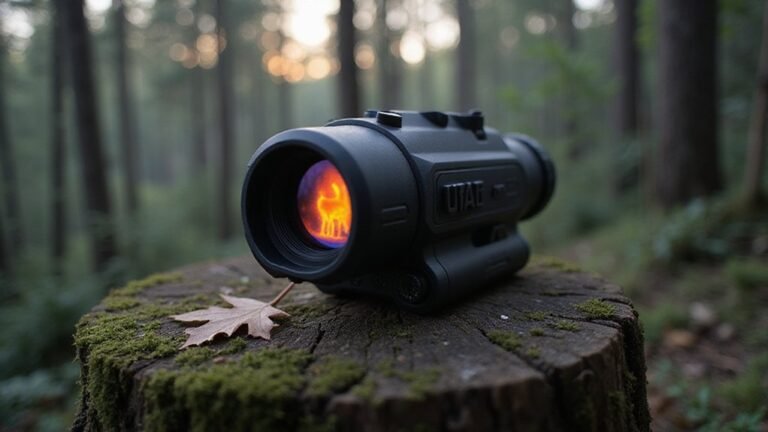
A thermal scope detects heat in total darkness by using infrared detection. Unlike visible light, it captures the infrared radiation emitted by all objects due to their heat. The germanium lens within the scope concentrates this radiation onto a microbolometer sensor. This sensor detects tiny temperature differences across the scene, even without any visible light. The core technology involves a focal plane array of these heat-sensitive pixels.
The sensor then creates a detailed heat map based on the measured infrared radiation. An onboard processor instantly converts this data into a visible image. Objects with higher temperatures emit more infrared radiation, appearing brighter in your thermal view. Emissivity, which depends on an object’s surface properties and material, influences the amount of infrared radiation it emits, meaning different materials at the same temperature can look different in thermal imaging. This characteristic allows you to distinguish between various materials and surfaces even in darkness. This advanced technology, much like in night vision equipment, represents a significant investment for any serious user. When making your selection, it’s crucial to understand the fundamental operational principles behind each type of device.

Advanced DLC film technology enhances wear resistance and extends the service life of the germanium window.

Extended Range. Wider Opportunity: With a 25mm Germanium lens and a powerful 3.5x base magnification, the RattlerV2 25-256 gives hunters a serious edge. Its thermal imaging scope lets you detect heat signatures out to 1,250 yards.
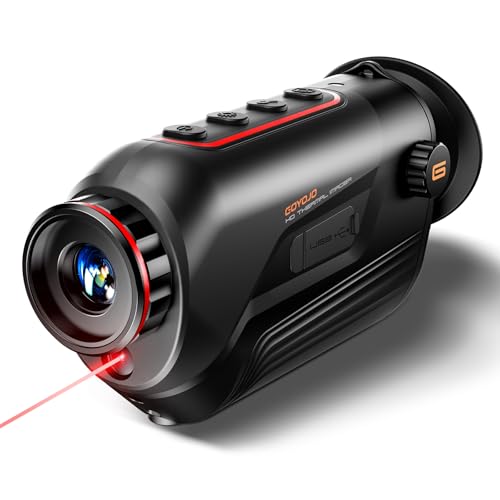
【Thermal Imaging Technology】 GOYOJO thermal imaging monocular features a state-of-the-art 256x192 thermal imaging camera sensor paired with a 12μm infrared detector. This advanced technology ensures high-resolution thermal imaging, providing users with a clear and detailed view of their surroundings in low-light conditions.
What Specs Actually Matter for Your First Thermal Scope?
Sensor resolution should be at least 384×288 pixels for effective hunting. This resolution offers a clear enough image to detect game in most environments without overspending on higher specs that may not significantly improve performance for your needs. The infrared radiation emitted by objects is what the camera’s microbolometer sensor detects to create an image. Higher resolutions can provide sharper images but often come with increased cost and faster battery drain, so balance your budget with the clarity you require. Like choosing a no-subscription trail camera, focusing on core performance specs maximizes value. Understanding the technology behind night vision can help you appreciate these trade-offs. For general hunting, a 384×288 sensor is a reliable starting point to ensure you can identify targets easily without unnecessary extras, and you should also ensure it has a low NETD value for better performance in cold or adverse weather.
Finding a Quality Thermal Scope on a Beginner’s Budget
Budgeting for your first thermal scope means focusing on models under $1,000, with the Cronus ATS Pro being a common option. It features a 256×192 sensor that’s effective within approximately 100 yards. However, scopes in this price range generally aren’t suitable for longer-range hunting, so keep your expectations realistic. For example, some affordable models offer multiple color palettes to improve target clarity in different environments. When comparing models, evaluating the image clarity in low-light conditions is just as crucial as it is when choosing a backup camera. Just like with DIY projects, having the correct tools and parts is essential for success. Remember, while this technology is powerful, a phone’s thermal capabilities are fundamentally different and often far more limited.
The $1,000 to $2,000 bracket offers better detection capabilities, such as the AGM Rattler V2 with a 384×288 core. This scope can effectively identify targets up to roughly 250 yards, making it a solid choice for ethical shots at medium distances.
For spending around $1,500 to $2,500, you can access premium features ideal for beginners, like a 50Hz refresh rate, which provides smoother image updates. When choosing a scope, prioritize your typical shooting distance, but also consider aspects like battery life—aim for at least 7-8 hours of continuous use—and recoil resistance to ensure durability with your rifle. Focusing on these practical features will serve you better than chasing maximum detection capabilities in a beginner’s budget.

Fast Targeting. Wide Field of View: The RattlerV2 19-256 offers a 2.5x base magnification and a wider field of view — ideal for close- to mid-range scanning and fast-moving targets. Whether you’re hunting hogs in thick brush or predators on the move, this thermal scope keeps your target in sight and your response time sharp.

Quick View: Explore the Oneleaf.ai Mars MT1000LRF, a cutting-edge thermal imaging scope with interchangeable lenses, ultra-sensitive NETD <20mK detection, 640x512 Sensor, 2x base magnification, 1x-8x digital zoom, 30/50/60Hz adjustable Refresh Rate and advanced features like a built-in Rangefinder and Ballistic Calculator. Perfect for hunting, security, and outdoor adventures.

[HIGH SENSITIVITY DETECTOR]- 256x192 Thermal sensor, 25mm detective lens, 3.5x basic magnification and a 7.0° horizontal field of view allow targets as far as 1422 yards away to be viewed clearly.
Step-by-Step: Mounting and Setting Up Your Thermal Scope
To ensure optimal performance and safety, correctly mounting and setting up your thermal scope is essential. Start with a clear, unloaded rifle to prevent accidents. Begin your alignment by meticulously cleaning all contact surfaces on the mount and scope to avoid any misalignment caused by debris or grease. Position the mount fully on the upper receiver and tighten the mounting hardware by hand initially to secure proper placement. Insert the scope into the lower halves of your mounting rings, then carefully set the top caps without tightening them fully. It is highly recommended to tighten the bottom screws first to establish a secure foundation before leveling. Tighten the mounting screws in a cross pattern—alternating between opposite screws—to evenly distribute pressure. Adjust the scope in the rings until the reticle is perfectly level, then verify eye relief and confirm that the scope does not contact the barrel. Ensure your cheek weld is comfortable and consistent. Once aligned, torque all screws to the manufacturer’s specified values, maintaining the cross pattern to prevent shifting. Double-check the level after tightening to confirm perfect alignment.

1.00 inches in center height, measured from the base of the mount to the center of the optic

The double tactical low profile scope mounts fit for 1 inch / 25.4mm scope tube on the picatinny rails.

Precision Medium 1" Rings for 11mm Rail: The CVLIFE 1-inch scope rings securely mount to standard 11mm or 3/8" dovetail rails. It offers an ideal sight line for a wide range of riflescopes, ensuring a solid foundation for hunting and shooting activities
How to Zero Your Scope and Start Practicing Your Scan
Start by carefully mounting your thermal scope and then zero it at 25 yards using a foil square target. Aim steadily and fire a single shot, then freeze the image to analyze the impact. Move the digital reticle directly to the heat signature at the point of impact to save your zero. Confirm accuracy by firing a second shot at 50 or 100 yards, adjusting as needed for precise alignment. This process is similar to resetting a game camera, where methodical steps ensure the device returns to a reliable baseline. For optimal performance in low-light conditions, using a night vision adapter can significantly enhance your setup’s versatility. Once your zero is established, practice scanning your environment smoothly to improve target identification skills. Focusing on a steady panning technique, like using smooth camera movements, will help you maintain a clear and stable image. Focus on distinguishing animals from background clutter, which sharpens your ability to make quick, effective shots in various settings. Finally, verify your zero with a three-shot group, ensuring your point of aim matches the point of impact, then save this profile for future use. using peel-and-stick thermal targets can streamline this zeroing process significantly.