How Do Night Vision Cameras Work?
If you’ve ever wondered how night vision cameras let you see in the dark, you’re not alone. These devices use different technologies to reveal what’s hidden in low light or total darkness.
From amplifying tiny amounts of light to detecting heat signatures, each method offers unique advantages. Keep reading to understand the core technology behind night vision and how it can work for you.
What Is the Difference Between Night Vision and Thermal Imaging?
Night vision and thermal imaging differ significantly in how they generate images in low-light conditions. Night vision relies on amplifying ambient light, such as moonlight or starlight, to produce a visible image. It captures reflected light, allowing you to see fine details and even achieve some color accuracy when using infrared illuminators. In contrast, thermal imaging detects the heat objects emit, creating images based on temperature differences. This allows thermal devices to work effectively in total darkness, fog, smoke, or obscured environments, but they only display heat signatures rather than fine visual details. This makes them ideal for search and rescue operations where detecting living beings is the priority. Additionally, night vision typically consumes less power because it amplifies existing light signals, while thermal imaging requires more energy to process and interpret the complex thermal data needed to generate images. DIY enthusiasts can build their own night vision camera using infrared LEDs and a modified digital camera.

FULL SPECTRUM CAPABILITY: Advanced camera modification allows capture of visible light, infrared, and ultraviolet frequencies for paranormal investigation and specialized photography

【Versatile & Universal Fit】 Transform any standard rifle scope with an eyepiece diameter of 38-44mm into a powerful night vision system. This DIY kit comes with everything you need to get started.

True Day & Night Vision with IR-Cut Switching – This night vision camera features an automatic IR-cut switching design that seamlessly transitions between daytime and nighttime modes. The built-in IR-cut filter delivers accurate, natural color images in daylight and switches to infrared-sensitive imaging in low-light or complete darkness, making it an ideal ir-cut switching webcam for 24/7 monitoring applications
How Traditional Night Vision (Image Intensification) Works
Night vision uses ambient light to produce visible images by amplifying the faint light present in dark environments. The process begins as an objective lens captures this low-level light and directs it into an image intensifier tube. Inside the tube, a photocathode converts the incoming photons into electrons through photon conversion. These electrons are then accelerated and propelled through a microchannel plate, which multiplies their numbers thousands of times via a cascading effect. This process relies on the photoelectric effect, a key principle of quantum mechanics. The amplified electron stream finally strikes a phosphor screen, where their energy is transformed back into visible light. This creates a bright, green-hued image that allows you to see clearly in low-light conditions. The entire process happens almost instantaneously, providing real-time visibility in darkness. This technology of image intensification differs fundamentally from the heat-sensing mechanism of thermal scopes, which is a crucial factor to consider when comparing night vision vs. thermal for specific applications like coyote hunting.
How Thermal Imaging Cameras See Heat Instead of Light
Thermal imaging cameras detect heat instead of visible light because they capture infrared radiation emitted by warm objects. All objects with temperatures above absolute zero emit this type of radiation, which is invisible to the naked eye. The camera uses a specialized lens to focus this infrared energy onto a microbolometer sensor array. Modern designs often incorporate uncooled microbolometer sensors that are compact and energy-efficient. When the infrared radiation hits the sensor, it causes tiny changes in electrical resistance within each pixel. These resistance changes are then transmitted to the camera’s processor, which converts them into precise temperature data. The processor creates a visual heat map by assigning different colors to specific temperature ranges: cooler areas appear in blue, while hotter areas show up as red, white, or other bright colors. This heat map is displayed on the camera screen, allowing you to see heat signatures that are otherwise hidden from view. Understanding this thermal imaging technology is crucial for buyers who need to find problems invisible to standard cameras.
Key Components of an Image Intensification Tube
An image intensification tube operates by amplifying low-light scenes through several essential layers that work in sequence. The process begins with an input phosphor screen, which performs the first photon conversion by transforming incoming light into electrons at the adjacent photocathode. Composed of needle-shaped Cesium Iodide crystals, the input phosphor efficiently converts incoming photons into visible light. An electrostatic lens then focuses these electrons, ensuring they travel smoothly toward the next stage. A high-voltage anode accelerates the electrons, increasing their energy as they move toward the output phosphor. This final layer then converts the energetic electrons back into visible light, producing a much brighter image. The amplified image you see is a direct result of image intensification technology, which was developed from pioneering military research during World War II. Seeing these artifacts can help you distinguish real events from bugs on night vision camera anomalies. Assembling such intricate optical systems requires careful calibration, much like integrating a thermal camera onto a drone. All these components are housed within a sturdy vacuum envelope that maintains the pristine environment necessary for optimal operation. Essentially, you’re observing a rapid chain reaction of light amplification happening inside a glass tube.
How Digital Night Vision and Infrared Illumination Work
Digital night vision works by converting incoming photons into electronic signals, allowing you to see in low-light or dark conditions. Light enters through the lens and hits a CMOS sensor, which translates these photons into electrical data. Microprocessors then amplify this signal, improve image quality, and reduce noise, resulting in a clearer picture. When it’s completely dark, the device activates its Infrared LEDs, which emit invisible infrared light to illuminate the scene. The reflected infrared light is captured by the same CMOS sensor, enabling detection even in total darkness, and the budget-friendly digital night vision viewing range varies significantly depending on the power of its infrared illuminator. It’s important to distinguish this from thermal imaging technology, which detects heat signatures rather than reflected light. The processed data is then displayed on a built-in screen, typically an LCD or OLED, providing a sharp, high-resolution image. Unlike traditional analog tubes that produce a green hue, digital night vision offers a more natural view and can be easily integrated with recording technology.
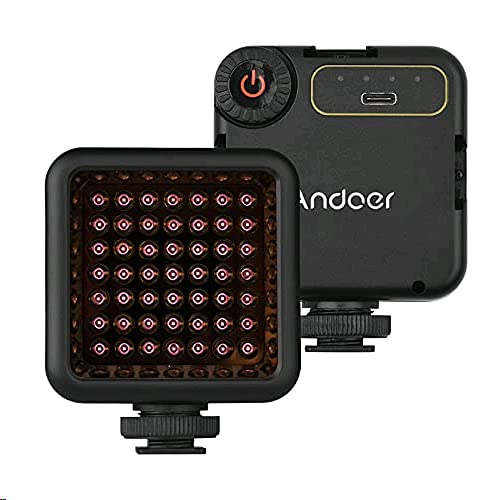
Versatile Lighting: Ideal for vlogging, video recording, and photography, this compact IR light ensures you're always ready to capture stunning footage in low-light conditions
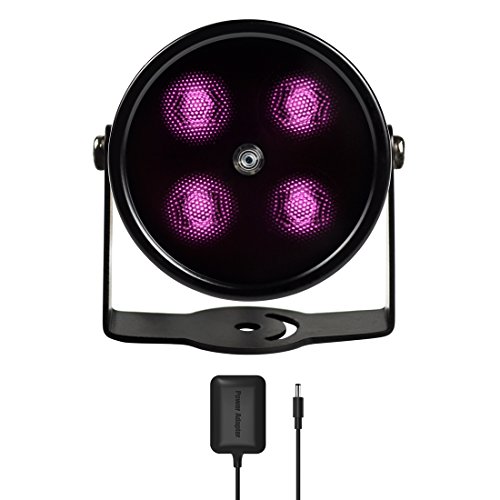
SPECIAL - Upgraded from the most classic mini 4 LEDs IR illuminator with all-around better materials and first ever in black coating

Local app control made easy: wifi + bluetooth pair to our trail camera hotspot (NOT home wifi), then preview/download on phone within 50ft wireless range—no fees, no card pulling, just smarter scouting
What Camera Sensors Detect Invisible Light?
Camera sensors detect invisible light based on the materials they are made from. Silicon sensors commonly found in standard cameras can capture near-infrared light up to about 1000 nanometers (nm). For shorter-wave infrared beyond 1100 nm, sensors made from indium gallium arsenide are necessary. Different sensor materials are sensitive to specific wavelength ranges, enabling detection of various invisible light spectrums. Ultra-low light imaging may employ single photon avalanche diodes, which can sense individual photons. These single photon detectors are being developed by universities and commercial entities to revolutionize fields like medical imaging and autonomous navigation. Hybrid sensors that combine materials like graphene and quantum dots can detect a broad spectrum from ultraviolet (UV) to infrared on a single chip. Each technology converts specific wavelengths of invisible infrared radiation into electronic signals that your camera then processes into visible images.
Thermal Imaging: Interpreting Heat Signatures
When you’re using a thermal camera, you’re actually interpreting the heat signatures that all objects emit as invisible infrared radiation. An FPA sensor detects this radiation pixel by pixel, converting it into digital temperature data based on Planck’s Law. Your camera’s processor then applies color mapping to translate these temperatures into a visible thermogram, assigning specific colors to different heat ranges. However, emissivity factors cause variations in readings because different materials emit infrared radiation uniquely. For buyers, considering the specific sensor type is crucial as it directly impacts image resolution and system cost, making sensor quality a key budget consideration. You are only seeing surface radiation, not internal heat, and the image lacks fine detail. Despite this, thermal imaging remains highly effective in total darkness and through smoke, allowing you to distinguish heat sources from cooler backgrounds.
Strengths and Weaknesses of Each Technology
Active IR illumination is effective in complete darkness but depends on a functioning emitter. If the IR emitter breaks, the night vision device becomes useless. You won’t see any color images, and the range is limited compared to other options. Low-light sensors can provide color images even in near-dark environments, but they struggle with motion blur and cannot operate effectively in total darkness. Their performance is heavily reliant on precise calibration of the sensor and can be impacted by battery life considerations. Fusion technology combines infrared and visible light sensors to give detailed color images but increases complexity and cost. Using active visible light allows for immediate color recognition but reveals your position, whereas infrared illumination remains covert but cannot penetrate solid objects. The choice of hunting light color can further influence detection and visibility when using these systems. All these systems face inherent range limitations and environmental interference. To perform well, each requires good infrared sensitivity and proper environmental conditions. The ideal choice depends heavily on the intended use case for the night vision device.

【5K Cinematic Clarity & Versatility】 This digital camera captures stunning 5K/20fps videos (also 4K/60fps) and 64MP photos with a high-sensitivity CMOS sensor. Perfect for vlogging, travel films, podcast recording, family events, and interviews, delivering cinema-grade detail even in motion.
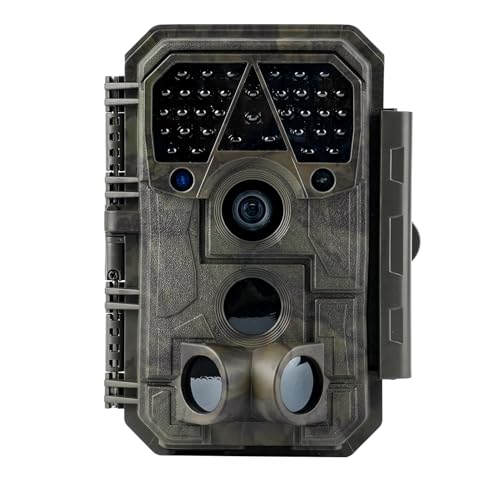
Crystal-Clear 64MP Photos & 1296p HD Video – Stunning detail day or night, thanks to advanced image tech and a high-performance f/1.6 aperture lens.
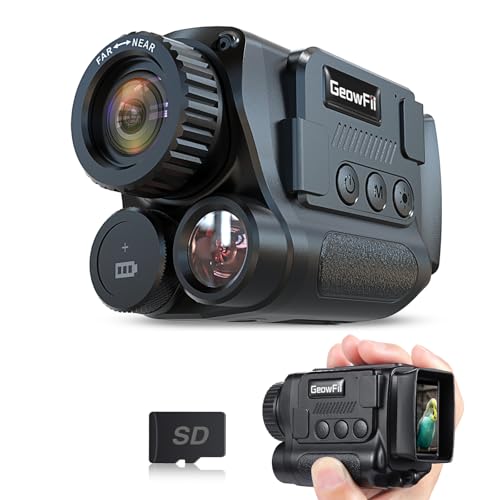
4K Upgraded & Practical—— GeowFiiTech Night Vision Monocular features a 4K version with a 25mm multi-coated lens, enhancing imaging for day and night use. With 4K video, 40MP photos, and essential functions, this monocular night vision meets outdoor needs effectively
How to Choose: Night Vision vs. Thermal for Your Needs
Choosing between night vision and thermal imaging depends on your specific needs and circumstances. Night vision devices amplify available light, allowing you to see in low-light conditions by enhancing ambient illumination. They excel in situations where identifying details, such as faces or text, is important for navigation, surveillance, or reconnaissance during dusk or dark nights. Thermal imaging, on the other hand, detects heat signatures emitted by objects and living beings; it can see through fog, smoke, and darkness that completely obscure visibility. Thermal is particularly effective for long-range detection of living targets and spotting heat sources against cold backgrounds.
When selecting, consider whether your priority is detailed observation or detection under difficult conditions. Night vision offers clearer images for recognizing features but may struggle in total darkness or adverse weather. Thermal imaging provides robust detection capabilities regardless of lighting, but with less detail, making it less suited for identification tasks. Modern devices achieve this through advanced image intensifier tube technology, and understanding the high costs of components can help when budgeting for your purchase. For precision shooting, many users still prefer a night vision rifle scope for accurate shot placement. When comparing top coyote hunting gear, reviews often highlight these differences in quality and performance to guide your purchase. Cost differences are notable: thermal devices generally have higher upfront prices but may save you time and effort in challenging environments. Also reflect on ethical implications, like privacy concerns when using surveillance technology. Your choice hinges on whether you need precise identification or broad detection capability.

Enhanced Fixed Magnifier with Expanded Field of View: The Gen II features an upgraded fixed magnifier boasting a wider objective lens. This delivers a significantly enhanced field of view for superior situational awareness and target acquisition, surpassing the limitations of a removable 2x magnifier.

Fast Targeting. Wide Field of View: The RattlerV2 19-256 offers a 2.5x base magnification and a wider field of view — ideal for close- to mid-range scanning and fast-moving targets. Whether you’re hunting hogs in thick brush or predators on the move, this thermal scope keeps your target in sight and your response time sharp.

High-Resolution OLED Display: Equipped with a 1920x1080 OLED HD display, goyojo night vision scope delivers crystal-clear images, ensuring you can observe details with precision both during the day and at night. Whether you're an avid hunter, wildlife enthusiast, or security professional, this advanced monocular offers unparalleled clarity and versatility.