Night Vision Goggles: A Complete Beginner’s Guide
Wondering how night vision goggles work and which one to start with? The right choice can make exploring in low light clearer and more comfortable. Typically, a beginner should look for a lightweight Gen 2 or Gen 3 monocular, focusing on good tube quality, weather resistance, and a durable metal housing.
Keep reading to learn how to choose the best option for you.
How Do Night Vision Goggles Actually Work?
Night vision goggles work by amplifying available light to produce a visible image in darkness. They utilize two main processes. The first is image intensification, which gathers ambient visible and near-infrared light, focusing it onto a photocathode that converts photons into electrons. These electrons then pass through a microchannel plate that multiplies them exponentially. The amplified electrons strike a phosphor screen, creating the familiar green or white image seen through the goggles. This process allows you to see in low-light conditions by increasing the brightness of the scene. In complete darkness testing in specially designed environments, difficulty distinguishing eyes open versus closed is common due to absent photon input. For those on a budget, understanding price drivers can help identify the most cost-effective model. Unlike thermal imagers that sense heat differences, night vision relies entirely on available or reflected light. When choosing between the two technologies, understanding the unique strengths of each can clarify which device best suits your needs.
In environments with little to no moonlight, many budget-friendly units switch to infrared detection. They use an active illuminator, which is an invisible near-infrared flashlight. The sensor detects the reflected near-infrared light to form an image. Additionally, some night vision devices incorporate thermal imaging technology. These systems sense heat differences rather than light, making warm objects, like people or animals, stand out against cooler backgrounds. They can detect a person over 200 yards away even in complete darkness. This ability to detect heat signatures is key for seeing in total darkness where no light exists. All these processes deliver a real-time visual output through your eyepiece, transforming darkness into an understandable scene.
Which Night Vision Type Is Best for Beginners?
A green-hued image intensification monocular is the best choice for beginners. It uses direct image enhancement to amplify available light, providing a clear view that looks like the natural night scene but in shades of green. This type is straightforward to operate and costs significantly less than thermal or digital options. Additionally, this device maintains stealth by not emitting visible light, a key benefit for covert beginner use. For added protection of your investment, you can build a trail camera security box to house the monocular in harsh outdoor conditions. For those interested in aerial observation, building a DIY thermal drone can be a more advanced project that incorporates a thermal camera module into a custom quadcopter frame. Understanding how image intensifier tubes convert photons into electrons is essential for appreciating why this technology excels in low-light conditions.
Skip digital night vision unless budget is your only concern. Digital devices tend to have lower image quality and shorter battery life, which can be frustrating as you learn. Monoculars based on Gen 2 or Gen 3 image intensification technology offer superior light amplification, making night observation easier and more enjoyable.
Thermal imaging, which detects heat signatures with infrared technology, is generally not recommended for beginners. It does not produce a natural-view experience and is usually more expensive. Starting with a monocular that offers Gen 2 or Gen 3 image intensification is a practical step toward more serious night vision.

CLEARLY IN 100% DARKNESS WITH 7 INFRARED ILLUMINATION LEVELS: Upgraded YUANZIMOO night vision monocular features 850nm IR illuminator, 1.3MP FHD CMOS sensor and 7 gears IR levels adjustment. Brings you a wonderful experience both daytime and 100% darkness in your wild explorations

AGM PVS-14 is a rugged, multi-purpose night vision monocular used globally in challenging environments.

Day or Night Viewing - Capture video in both daytime and nighttime modes. Store files directly to a microSD card for easy viewing and sharing.
Night Vision Buyer’s Checklist: Key Features to Compare
Before purchasing a night vision device, compare key features to ensure it fits your needs. Start with tube quality: Gen 3 tubes provide superior clarity and higher sensitivity in extreme darkness compared to Gen 2. Always verify that the tubes are tested and certified; beware of blemished or second-hand tubes and demand original test data to confirm performance.
Next, evaluate image performance. Check the resolution to gauge sharpness at various distances, the gain for how much light the device amplifies, and the field of view, which determines your situational awareness. Inspect edge clarity as well—blurry edges indicate lower-tier optics. For devices with integrated recording or wireless features, understanding Quick Connect setup can streamline pairing with external monitors or apps.
Comfort is essential since heavier units over 650 grams can cause fatigue within 30 minutes. Test the weight and balance in your hand or mount setup. Compatibility with your existing equipment and comfort during extended use should influence your choice. Additionally, be aware that red night vision goggles have been banned in certain contexts due to safety and regulatory concerns for users.
Durability cannot be overlooked. Metal housings typically withstand harsher conditions than polymer ones. Confirm weather resistance features—look for MIL-STD-810 or IP ratings that indicate the device’s resistance to water, dust, and shock, ensuring it can handle your environment.
Finally, review power options. Battery life needs to match how long you’ll be in the field, so check specifications for endurance under typical use. The battery type should be common and easy to replace. An integrated IR illuminator is vital for total darkness, and consider the total cost of ownership, including initial purchase, spare batteries, and warranty coverage for long-term peace of mind. For high-end models like the PVS-15 and PVS-31, performance and cost often dictate which unit best suits your mission.
Image Intensifier Tube: Gen 3 Auto-Gated White Phosphor Level 1 technology provides superior image clarity and performance in low-light conditions

DUCO Fit Over Design with Side Shields – Night vision glasses for men women worn comfortably over most glasses, expanding peripheral vision for a wider field of view. Available in M and L sizes for a secure, personalized fit
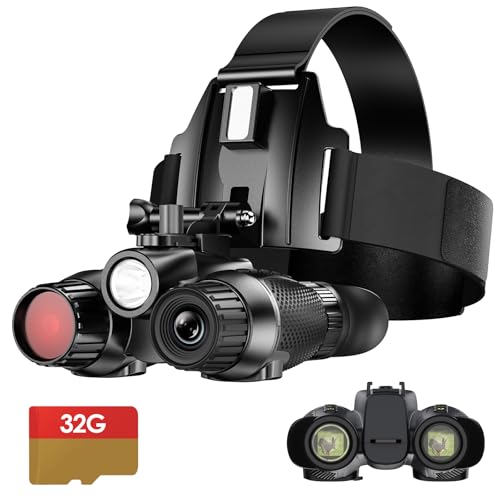
【3D Naked-Eye Effect】Enjoy clear and detailed 3D virtual reality night vision with dual-screen, dual-eyepiece naked-eye 3D viewing. Capture stunning 36MP photos and ultra-high-definition videos.
Monocular vs. Binocular Night Vision: Which Should You Choose?
Choosing between a monocular and a binocular night vision device depends on how you plan to use it and what you’re willing to compromise on. If you’re looking to save money, a monocular is the more economical choice. It’s lighter, easier to carry, and suits quick, short-term observations. However, it sacrifices depth perception because only one eye receives the intensified image, which can affect how you judge distances or navigate complex terrain. Additionally, upgrading from a monocular to a binocular is straightforward by adding a second unit and bridge, making initial investments more flexible for future upgrades. Night vision devices that use one tube also offer lower power consumption, increasing battery life on field trips. For those prioritizing military-grade durability, a monocular is often the preferred option for rapid target acquisition.
User preferences often favor binoculars for longer periods of use. With both eyes engaged, you’ll experience less eye strain and gain better situational awareness. Binoculars also provide stereo vision, improving obstacle detection and navigation. They tend to feel more immersive, especially over extended observation sessions. The trade-offs are that binoculars are generally bulkier, heavier, and come with a higher price tag compared to monoculars. If your tasks involve stationary observation or moving slowly in a controlled environment, binoculars offer advantages. For portability, quick checks, or budget-friendly options, a monocular works well.

NIGHT VISION GOGGLES FOR ADULTS 4K – Experience clear digital night vision with a 4K imaging system and large 4.5" HD screen. Designed for nighttime observation, outdoor exploration, camping, hunting, and wildlife viewing.
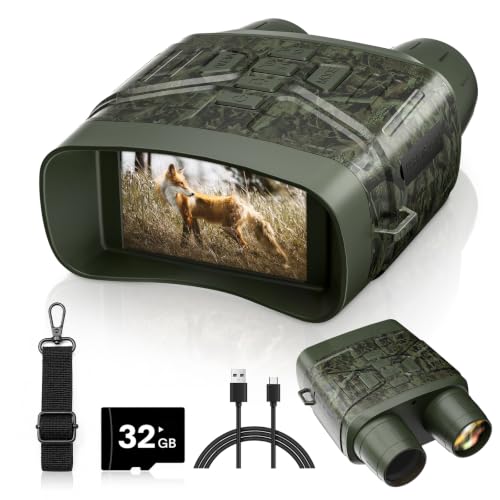
Day and night viewing: Use these night vision goggles in daylight, low light, or complete darkness. The 850nm infrared illuminator provides clear black-and-white viewing at night for hunting, wildlife observation, camping, and property monitoring.

1:1 Realistic AN/PVS31 Night Visions Goggles. It looks real that your competitor/enemy/adversary can't tell the difference.
How to Set Up, Protect, and Store Your First Night Vision Setup?
To set up, protect, and store your first night vision device safely, follow these steps. First, assemble your helmet, shroud, and mount before inserting the battery. This allows you to check fit and breakaway features safely without risking damage. Once assembled, balance your rig with a counterweight and tighten the rear straps first for stability. Adjust the eye relief to ensure a comfortable view, then focus the objective lens to sharpen the image. After that, dial in the rear diopter and fine-tune the focus for each eye using inter-pupillary adjustment. Consider choosing an articulating model for flexibility, as it can flatten or stay above your eyes for quick adjustments during use. These steps align with the tools and practical tips from a complete beginner’s guide to drawing and setting up night vision goggles. Additionally, in low-light environments, this setup benefits from an infrared illuminator to provide invisible light that the device can amplify for clearer vision. However, be aware that using an infrared illuminator can increase your visible signature to others with similar equipment, a trade-off often discussed when comparing active versus passive imaging systems.
For battery safety, always remove the battery when storing your device to prevent drain and corrosion. Practice lens maintenance by keeping lens covers or bikini covers closed when not in use. Store your night vision in a dry, hard case with silica gel packets to maintain dryness and protect your tubes from dust and moisture. Keeping your device protected and stored correctly ensures it remains mission-ready and extends its operational life.

【Display Model】: The Gayontech Four-Tube Binocular Night Vision is just a Dummy Model with no function, can be used for display or cosplay

NO Function: 1:1 restore PVS15 binoculars night vision model. Night Vision Mount Compatible with night vision devices such as PVS15, PVS18, GPNVG18, and more

【Display Model】: The Gayontech PVS15 Binocular Night Vision is just a Dummy Model with no function, can be used for display or cosplay