Essential Tips for Game Camera Placement
You’ve probably wondered how to get the best shots from your game camera without wasting time or missing key wildlife moments.
The secret isn’t just about choosing the right camera but placing it strategically in the ideal spots. Proper positioning can significantly increase your chances of capturing clear, usable images.
Keep reading to learn the tips that will help you set your camera for success.
Face North to Avoid Direct Sun
Point your trail camera north whenever possible. This orientation stabilizes lighting conditions throughout the day, keeping direct sunlight out of the lens. East- or west-facing cameras often catch harsh sunrise or sunset glare, leading to washed-out, overexposed images. North-facing placement reduces the chance of whiteout and backlighting that can obscure animal features. It also lessens false triggers caused by shifting sunlight hitting the sensor. Before mounting, use a compass to confirm your angle adjustment. If north isn’t practical, south is a good fallback. Shade from trees or brushy draws can further control glare when north isn’t an option. Always consider site conditions—rules are flexible. Pair your camera’s direction with open sight lines for clearer captures. For rugged terrain, you could adapt a thermal drone build to scout and verify optimal camera angles from above before committing to a mount. If you plan to monitor in total darkness, consider whether your camera uses night vision or thermal technology to ensure the best detection of passing wildlife. Understanding how cellular trail cameras transmit images via onboard modems can help you choose a model that avoids connectivity issues in remote north-facing setups.

30MP Photos & 1080P HD Videos for Clear Wildlife Monitoring:Capture detailed outdoor moments with 30MP high-resolution photos and Full HD 1080P videos. The advanced image sensor delivers clear and vivid images during daytime and reliable performance in low-light environments. This mini trail camera helps capture wildlife activity, deer movement, and outdoor scenes with improved detail, making it ideal for deer scouting, wildlife observation,Garden Monitoring and property monitoring.

New version trail cam: Clear Day & Night Imaging Capture sharp 64MP photos (adjustable: 5/16/36/48/56/64MP) and smooth 4K HD videos (3840x2160P /2560x1440P). The high-quality optical lens ensures crisp daytime images and night vision performance, making it ideal for wildlife observation, deer scouting, and property surveillance.

Mount at 3–4 Feet, Angle Down 5–10 Degrees
Position your mount at 3 to 4 feet above ground level for optimal deer detection. This height offers a balanced view that captures full-body shots and antler details while reducing false triggers caused by wind-blown branches near the top of the frame. Keep the camera angled downward by 5 to 10 degrees to focus the field of view on the ground ahead. This tilt helps to target the animal’s body profile and limits images dominated by overhead foliage or brush, making it easier to identify species and age class. Additionally, face the camera north or south to prevent false triggers from sunrise or sunset glare. To further reduce unwanted captures, clear nearby brush that may sway in the wind and trigger the sensor. Choosing a cost-effective data plan can reduce overall expenses for users of Moultrie cameras.
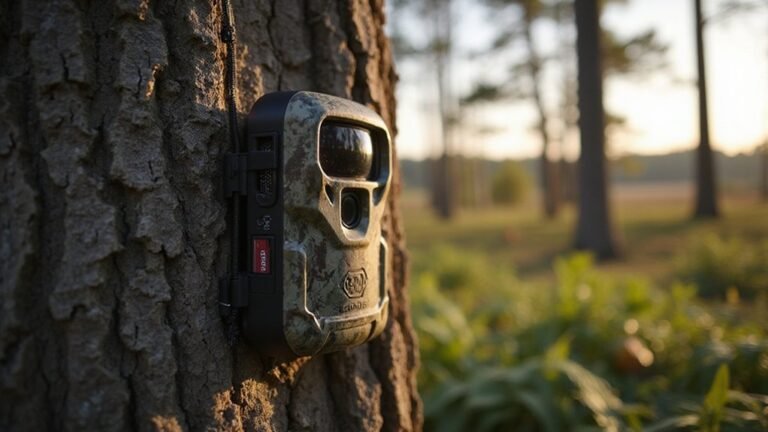
Start with the recommended height—around 3 to 4 feet—then fine-tune based on your terrain and target species. For smaller game, such as rabbits or grouse, lowering the mount to 1 to 3 feet improves detection success. After installation, check your camera setup on-site: clear nearby brush and examine the camera’s view to ensure it includes the desired area. Adjust the tilt if necessary to maximize full-body captures and enhance visibility of antlers or distinguishing features, which are crucial for identification. For trail cameras like the Spypoint Flex M, mounting on a sturdy tree helps prevent movement from wind or animal impact.
Set Your Camera 45 Degrees to the Trail
Position your camera 45 degrees to the trail. This angle allows you to capture both entry and exit movements in a single pass. Placing the camera diagonally improves identification of species and antlers because you reduce ear- and antler-blur that can occur with direct, head-on shots. Aim the camera across and slightly along the trail, not directly down it, especially on predictable movement corridors like deer crossings and pinch points. After setup, double-check the angle; small adjustments can significantly influence trigger timing and image quality. This diagonal setup also minimizes false triggers by reducing sun glare when cameras are not facing east or west. Proper positioning ensures clearer, more informative sequences of wildlife movement. Understanding heat signatures helps you anticipate where animals will pause, as a thermal camera can reveal residual body heat on a trail just moments after an animal has passed. For best results, position your camera at animal height to capture more natural and detailed images. Mastering these placement techniques also involves adjusting the camera’s detection zone to match the width of the trail for optimal trigger sensitivity.

HIGH-QUALITY HOLDER - Trail Camera Holder Tree Mount is a versatile & practical accessory for mounting trail cameras securely on trees in outdoor settings; The holder simplifies the process of positioning your trail camera for optimal image/video capture

【Field Application】Adjustable length and adjustable lift. The stand can be steadily inserted into the ground and is made of thick Aluminum for superior stability and durability.

360° ROTATING TRAIL CAMERA MOUNT – Easily rotate the mounting platform to adjust your camera’s viewing direction. The flexible design helps you fine-tune camera positioning for a broader monitoring area and the angle you need
Clear Brush Within 10 Feet to Stop False Triggers
Clearing vegetation within 10 feet of your camera is essential to prevent false triggers caused by wind-moving brush, grass, and branches. When plants sway in the wind, they can activate the motion sensor without any animals present, filling your memory card with empty images. By removing all nearby vegetation within this range, you eliminate these wind-driven false triggers, ensuring your camera captures only genuine activity. This brush clearing also increases the likelihood of successful daytime and nighttime visibility, leading to longer soak times with less maintenance.
This clearance also improves your camera’s line of sight, leading to sharper, more focused shots. Additionally, at night, nearby sticks and debris can reflect infrared flash, reducing its effective range. Focusing on the area directly in front of the sensor and lens minimizes these reflections and maximizes detection accuracy. Pay close attention to waving grass, hanging limbs, and bushes that move across the detection zone, and recheck your setup after windy days or seasonal growth. For optimal nighttime performance, consider whether a monocular or binocular device might better suit your observation needs when checking camera placement in low light. A thermal scope can detect heat signatures from animals even in complete darkness, which may help identify areas of frequent activity before positioning your camera. Using night vision technology in low-light conditions can also help you verify your camera’s field of view and detect any hidden obstructions. Maintaining a clear area not only reduces unnecessary images but also produces fuller, unobstructed animal photos instead of partial or blocked shots. This step is a simple yet crucial part of setting up an effective wildlife camera system.
Target Funnels, Crossings, and Known Travel Routes
To maximize your camera’s effectiveness, target natural funnels such as pinch points between woodlots or fence gaps. These locations concentrate wildlife movement into narrow corridors of about 10 to 15 feet wide. Place your camera 15 to 20 feet from the funnel and angle it roughly 45 degrees to the side to capture side profiles of passing animals clearly. For crossings like shallow stream riffles, position your camera perpendicular to the trail to better detect fast-moving animals. When monitoring known travel routes indicated by fresh tracks or scat, mount your camera 3 to 4 feet high and angle it across the trail. Facing north or south helps reduce sun glare, resulting in clearer images and longer observation times. Understanding the different types of game cameras helps you choose a model with appropriate detection speed and resolution for these specific setups. For nighttime monitoring in these areas, a thermal monocular can help you scout for animal activity before placing your camera. In conjunction with game cameras, low-light performance is critical, and image intensifier tubes are often used to amplify available starlight or moonlight for clearer night vision.

Simplify Tracking Camera Mounting Bracket: The tree camera mount can be installed with the pointed screw and expansion screw easily and effectively, which keeps your device firmly fixed for optimal viewing;

Sturdy Construction: Crafted with durable aluminum poles and a steel frame, this trail camera holder ensures stability and longevity

【Field Essential】 Game & Trail Camera Mount threaded head angle can be adjusted at will, stainless steel bracket length adjustable, lift adjustable. The trail Camera Mount tripod plug can be inserted into the ground stably, and the thick stainless steel material provides excellent stability and durability.
Aim at Food Plot Entrances, Not Field Interiors
When scouting a food plot, focus your camera on the entrances rather than the interior. Deer typically approach from cover, pausing at the edges before stepping out into the open. Placing your camera near field borders where tracks, trails, or browse lines are concentrated increases your chances of capturing movement and activity. Position the camera to include both the entry route and a view of the food source behind it. This setup allows you to see when deer are feeding and whether they are entering early or waiting until dark. Targeting cover material used for staging provides valuable insights into deer patterns, while edge-focused cameras minimize guesswork by monitoring approach and entry points. This approach also avoids high-pressure areas by keeping your presence and scent away from the field interior, encouraging more natural daylight visits.
Use Water Crossings and Active Scrapes as Anchor Points
Using water crossings and active scrapes as anchor points helps you target high-traffic areas where deer tend to move predictably. Water crossings concentrate deer along narrow, predictable zones, especially where shallow riffles meet established trails. Position your camera across the bank approach, not directly over open water, to better capture entry behavior without glare. When it comes to scrapes, place your camera perpendicular to the signpost, angling slightly downward. This setup ensures you see deer working the scrape without staring into the sun and captures their full-body images. Mount the camera at chest height on a sturdy tree for stability, and trim the surrounding grass to reduce false triggers. This strategic placement allows you to monitor staging, circling, and movement within these natural funnels—the areas where deer are most likely to move next—resulting in cleaner images of both does and bucks. Understanding how trail cameras use passive infrared sensors to detect heat and motion helps you choose the best mounting angle for these anchor points. For optimal results, choosing a model with high-quality sensor performance, as reviewed in the guide to top trail cameras, ensures you capture crisp images in these anchor-point locations. Since exposed cameras are prone to theft or damage in these high-traffic zones, a DIY security box can protect your equipment without altering its trigger speed or detection range.
Plan Access Routes That Avoid Bedding and Wind
Mapping access routes that avoid bedding and wind is essential to minimize your scent influence and increase your chances of success. Stay on logging roads, travel corridors, or at cover edges, which allow you to move swiftly without disturbing bedding areas. Take an indirect path that runs parallel to deer movement rather than a direct line, helping you remain quieter and less noticeable. Approach downwind of the likely bedding area so your scent drifts away from resting deer, not into their sanctuary.
Check camera placement during midday when deer are typically bedded and less alert to reduce disturbance. Limit your visits and time your ground checks during these low-activity periods to keep movement discreet. Before hanging a camera, clear noisy brush from your route to stay silent during your in-and-out. If wind conditions shift unexpectedly on a ground check, abort your outing—trying to retreat cleanly is better than risking a scent trail in their bedding area.
Space Cameras 300 Yards Apart for Full Coverage
Spacing cameras 300 yards apart can work if their field of view covers that distance. However, the critical factor is not a fixed separation but the camera’s actual viewing range. Long-range units like the Marksman 300-yard system can be spaced that far apart, but most standard cameras typically cover only 30 to 100 feet. To ensure full coverage, you need a clear line of sight without obstructions like trees or buildings blocking the view. Overlapping the coverage areas between cameras prevents blind spots and provides redundancy. This overlap also improves motion detection accuracy because movement crossing into multiple camera fields triggers more reliable alerts. Keep in mind that infrared illumination becomes less effective beyond your camera’s rated range. Additionally, a 300-yard gap exceeds typical Wi-Fi limits of about 300 feet, so you might need specialized networking solutions. Always test camera clarity at the maximum distance before final installation. For cameras with limited range, consulting top sources for night vision equipment can help identify models suited to longer distances. Narrow lenses can capture detailed images at long range, while wide-angle lenses cover more area but may sacrifice detail and identification ability. For serious shooters, this system is positioned as a high-end, investment-grade tool intended for frequent long-range practice and professional-level shot analysis. Remember that even with a clear line of sight, total darkness will prevent most standard cameras from capturing usable footage unless they feature active infrared illuminators rated for that specific distance.

🏆 【Improved Features for 2026】 2K UHD video & full-color night vision, free cloud storage, support for 2.4G & 5G WiFi, 1-6 months battery life, work with Alexa, IP66 waterproof and dustproof. Cameras for Home Security

Blink Sync Module XR is the first system hub to extend the range of your Blink Outdoor 4 wireless smart security cameras so you can see what’s happening around your entire property with ease.

Versatile TIGERSECU Super HD 1080P bullet-shape security camera designed for use with 4 different types of recorders: HD-TVI, AHD, CVI, and CVBS 960H D1 analog DVRs. Integrated 4-in-1 camera switch makes it easy to add on to a variety of DVRs. For 720p or D1 systems, simply switch the camera mode to CVBS (944X480).
Check Batteries and SD Cards Only During Scheduled Visits
Scheduling your visits to check batteries and SD cards helps minimize disturbances that can spook animals and trigger false captures. By sticking to a set schedule, you reduce human scent, movement, and noise around your camera, which keeps animals comfortable and less likely to be alerted by your presence. This consistent approach promotes stable capture conditions and avoids repeated trips that offer little benefit.
For battery maintenance, plan your checks based on the expected runtime. Battery life depends on settings, temperature, and how often the camera transmits data. You don’t need to check or replace batteries constantly—just do so during your scheduled visit. In cold weather, batteries drain faster, so consider shorter intervals in extreme cold or heat to avoid unexpected power loss. The continuous sensor operation is a primary factor in battery drain, even when the camera is not actively photographing.
For SD card management, swap the cards during the same visit. This prevents footage gaps caused by full storage and lowers wear on the card slot from frequent handling. During your scheduled maintenance, you can verify the card’s capacity and file integrity at the same time, which saves you effort. Adjust the frequency of these checks based on site activity: higher activity or denser wildlife populations require more frequent visits, while quieter sites can be checked less often.