How to Sight In a Thermal Scope: A Complete Guide
Struggling to get your thermal scope dialed in? Properly sighting it in ensures every shot hits exactly where you aim, saving you time and frustration in the field.
By following a few key steps, you can quickly zero your scope and build reliable ballistic profiles for different setups.
Keep reading to learn how to confidently set up your thermal scope for precision shooting.
Prep Your Rifle and Gear for a Thermal Scope Zero
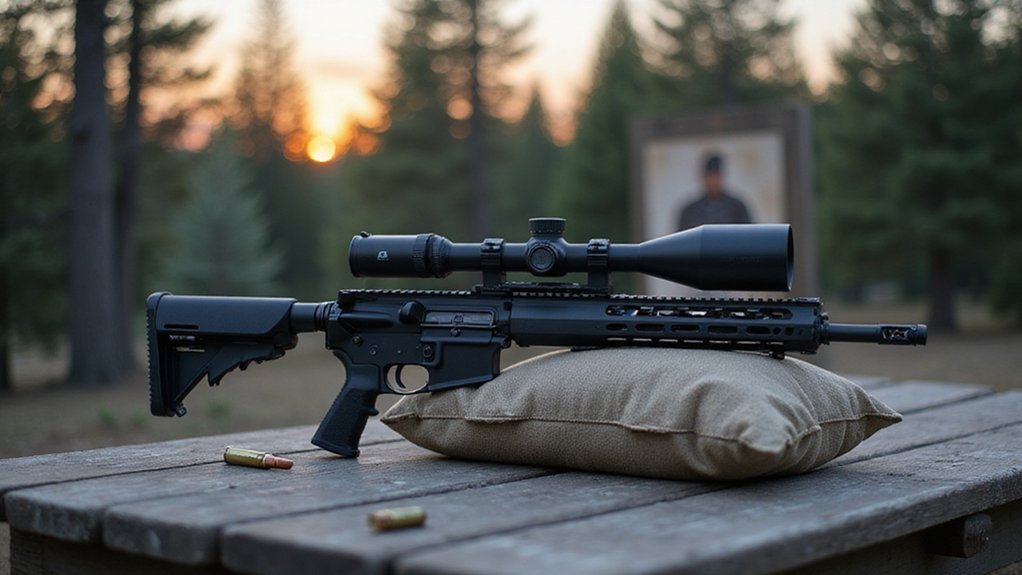
Ensure your rifle is mounted on a stable rest and a secure platform before zeroing your thermal scope. Use high-quality sandbags or a proper bench rest to prevent any movement during adjustments, as even slight shifts can throw off your accuracy. Confirm that your background is safe and that there is a proper backstop in place for safety. Selecting the correct thermal target is crucial, and using one specifically designed for thermal imaging will improve the precision of your zeroing process. Select the same ammunition load you plan to hunt with; consistency here ensures your zero remains accurate over time. Make sure your thermal scope has a full battery, and allow it to warm up to its operating temperature. Adjust the diopter and reticle settings to achieve a clear, sharp view before firing your first shot, and remember that the underlying technology relies on detecting infrared radiation. Understanding the difference between thermal imaging and night vision can help you use your equipment more effectively. Set up small, portable thermal targets at your intended zero distance before you begin.

Extended Range Thermal Target Pasters (10‑Pack): Includes ten 4” x 4” passive thermal pasters designed for zeroing thermal scopes and establishing intermediate aiming points

Upright Thermal Target: Designed for calibrating thermal scopes, providing a tight, consistent point of aim regardless of target angle

Detection of Heat Signatures
Set Up the Perfect Target for a One-Shot Thermal Zero
To set up the perfect target for a one-shot thermal zero, choose a target that provides a high thermal contrast against its background. Use a thermal-reactive target material that absorbs and retains heat, creating a distinct dark spot when heated. A highly effective and simple method is to use HVAC aluminum tape, peeling and sticking small squares directly onto the target surface. Attach this target securely to a stable, flat piece of cardboard, centering it precisely to avoid misalignment. Position the target at your intended distance—whether 25, 50, or 100 yards—on a safe backstop free of thermal obstructions. Ensure the target is heated significantly more than its surroundings so it appears as a clear, dark hotspot through your scope. This stark thermal signature allows you to aim precisely and achieve a one-shot zero with confidence, utilizing the detection of infrared radiation that defines thermal imaging technology, just as a game camera uses infrared technology for night vision.
Use Your Scope’s One-Shot Zero Feature to Dial In
To use your scope’s one-shot zero feature, start by selecting your zeroing profile and the desired distance from the menu. Make sure your rifle is stable and properly maintained to ensure consistent shots. Aim precisely at the center of the high-contrast thermal target and fire one shot. Freeze the thermal image immediately after firing to clearly see the glowing bullet hole. Once the image is locked, you’ll notice a secondary reticle showing the shot’s deviation.
Use your scope’s controls to move this reticle so it aligns with the actual point of impact. This step calibrates your scope by adjusting the XY coordinates, ensuring your crosshairs match where your bullet lands. For an initial zero, set up your target at 40 yards to confirm your shot is on paper before making further adjustments. Many Pulsar thermal models also allow for profiled ballistic data to be stored for different distances or ammunition types. Just as with assembling a drone, using the right tools and parts is essential for optimal performance. Understanding how to adjust thermal level and span will help you achieve a clear and detailed image of your target. Properly following these steps will make future shots more accurate by fine-tuning your scope efficiently with just one shot.

ULTIMATE HUNTING BUNDLE: Pairs the AGM Rattler V2 thermal imaging scope with 5 AGM thermal zeroing targets, a Field Boys 10,000 mAh USB-C power bank, a field tripod with scope-to-tripod adapter, and a 14-piece cleaning kit - everything you need to zero fast, stay powered up, glass steady, and keep your optic clear in the field

13 x 13 Thermal Zeroing Target: Designed for thermal scopes so impacts show clearly in your optic, allowing zeroing from your shooting position

ULTIMATE HUNTING BUNDLE: Pairs the AGM Rattler V2 thermal imaging scope with 5 AGM thermal zeroing targets, a Field Boys 10,000 mAh USB-C power bank, a field tripod with scope-to-tripod adapter, and a 14-piece cleaning kit - everything you need to zero fast, stay powered up, glass steady, and keep your optic clear in the field
Verify and Fine-Tune Your Thermal Scope Zero
To verify and fine-tune your zero, start by firing verification shots at both half and one-and-a-half times your primary zero distance. Expect small, predictable ballistic deviations; impact points should fall within this range. If impacts fall outside these parameters, your zero may need adjustment. Next, after allowing your barrel to cool completely, fire a single cold-bore shot. This shot must land within a 2 to 3 cm (0.8 to 1.2 inches) tolerance, indicating your zero is accurate for cold conditions. It is crucial to validate your zero from your actual hunting position rather than just a bench setup, as environmental factors and shooting posture can influence the point of impact. For fine-tuning, utilize the scope’s oneshot zero feature to make quick reticle adjustments after observing your impact point. Regularly perform these checks to maintain your zero, and always account for environmental adjustments such as temperature and humidity shifts, which can significantly alter your ballistic trajectory. Understanding a proper sighting procedure is essential for accuracy across all types of aiming devices. Remember that thermal scopes operate on a different light spectrum than traditional night vision, which is a key factor in their performance. The same principle of protecting sensitive equipment in the field applies to safeguarding your valuable scope, much like using a DIY trail camera box.

The shell of scope leveling kit is made from acrylic,contains viscous fluid to ensure the tool easy to read.
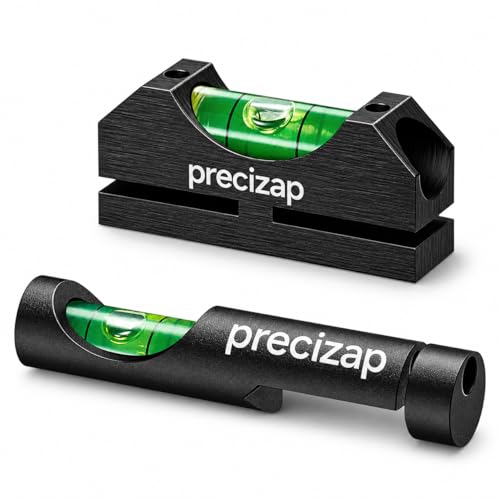
✅ 【High Precision Leveling for Long-Range Accuracy】Our scope leveling kit features a professional-grade bubble level with ultra-sensitive vials, ensuring your scope is perfectly aligned. Eliminates cant errors that cause missed shots at long distances, delivering consistent, pinpoint accuracy.
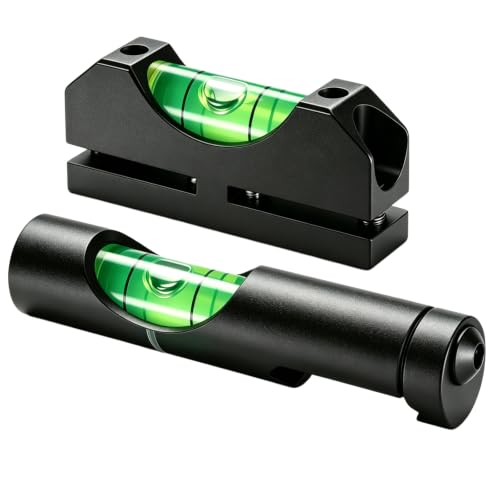
Various Choice: The scope leveling kit includes one scope level for rails and one universal magnetic scope level
Save and Manage Multiple Zero Profiles for Your Rifles
You can store 10 to 20 zero profiles in your digital thermal scope’s internal memory, depending on the model. This allows you to tailor each profile to specific rifles, ammunition types, and environmental conditions. To keep your profile list organized and accurate, regularly delete outdated or unused profiles. Label each profile clearly with the rifle model and caliber for quick identification during shooting sessions. Multiple zeroing profiles can be saved, with profiles A-E each capable of storing up to 5 zeroing settings.
Using multiple zero profiles ensures you can rapidly switch setups without recalibrating from scratch. When you change bullet types or switch rifles, update the corresponding profile by recording the new ballistic impact point. Just as with camera accessories that use a quick connect system, this efficient profile switching saves crucial time in the field. The green phosphor screen in night vision devices is chosen for its reduced eye strain, allowing for extended use in low-light conditions. Always verify your saved profile by firing a confirmation group at 100 meters to confirm it remains accurate under current conditions. Proper profile management minimizes errors and enhances your shooting precision. Given the investment in such optics, proper maintenance and storage are key to preserving their value and performance, similar to how night vision technology requires careful handling to prevent damage.
Why a Proper Thermal Zero Is Non-Negotiable for Hunters
A proper zero for your thermal scope isn’t optional—it’s non-negotiable. Temperature fluctuations can cause your point of impact to shift, especially due to thermal expansion of the rifle barrel during the first few shots. To maintain accuracy, you must perform a cold-bore zero under conditions that match your hunting environment. Even a temperature swing from morning to midday can throw off your zero, leading to missed shots or wounded animals. Verifying your zero at actual hunting distances ensures your scope remains reliable when every shot counts. This step isn’t just about precision; it’s an ethical responsibility to ensure a quick, humane kill. This verification is best accomplished by firing and analyzing a three-round group to confirm your adjustments before heading into the field. For this process, operating in total darkness is often necessary, requiring a supplemental high-power IR illuminator to see your target. Just as you would reset your Tactacam Reveal X after changing settings, you should verify your thermal zero anytime conditions or equipment change, a process as crucial as understanding camera model trade-offs.