How to Make Night Vision Goggles: A DIY Guide
Wondering how to create your own night vision goggles? If you’re curious about turning simple components into a device that lets you see in the dark, you’re in the right place.
By the end of this, you’ll have a clear idea of the basic parts and steps needed to build functional night vision gear at home.
The full process is just a few steps away.
What You Need to Build DIY Night Vision Goggles
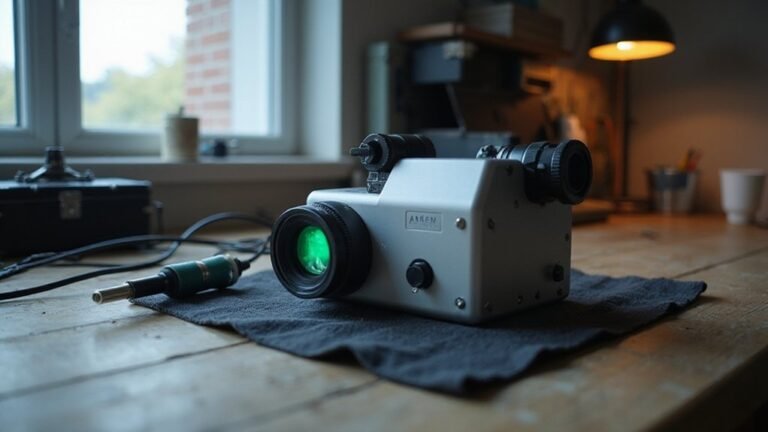
To assemble your DIY night vision goggles, you’ll need several key optical components. Start with an IR-sensitive camera module or an image intensifier tube, which can detect low levels of infrared light and convert it into visible images. Understanding the key differences between these technologies is crucial for choosing the right one for your project. Focus an objective lens onto this sensor to collect and direct light effectively. An eyepiece then magnifies the image for comfortable viewing.
For the electronic setup, choose a portable display compatible with your video output, and a microcontroller to process the video signal from the camera. You can use a $10 camera from Amazon if it is sensitive to infrared. Connecting these components requires appropriate cables, ensuring secure and stable connections. A step-down converter is also essential for managing power efficiently, similar to its role in a thermal imaging build.
Prioritize the durability of all components; use heat-resistant solder and sturdy mounts to withstand movement and rough handling. For power, select a lithium-ion battery pack paired with a step-down converter to match your system’s voltage requirements efficiently, avoiding unnecessary energy waste. Finally, secure everything within a sturdy goggle frame that includes mounts for the optical and electronic parts, ensuring stability and comfort during use.

Day/Night Vision: IR-CUT Filter switched in and out automatically based on light condition (only visible light during the daylight and infrared sensitivity during the night with 850 IR LEDs on)

Day/Night Camera - IR Cut filter switched in and out automatically. A NoIR camera that keeps videos and images from washed out or looking pink yet still offers a decent night vision

Based on 1MP monochrome (black&white) global shutter sensor OV9281, assembled with a 70°(H) low distortion M12 lens without IR pass filter, sensitive to IR.
Where to Source Components and Manage Your Budget
To source components affordably, start your search on eBay and Alibaba for cost-effective housings and optics. For the image intensifier tube, which is your biggest expense, prioritize compatibility with your selected housing to avoid costly modifications later. Look for used Gen 2+ and Gen 3 tubes on auction sites and within specialized Discord communities like r/NightVision, where you can often find better deals through direct transactions. Just as cellular trail cameras transmit images using wireless networks, your night vision project relies on integrating specialized components. This technology fundamentally works by amplifying available ambient light, such as starlight or moonlight, to create a visible image. Unlike thermal imaging, which detects heat signatures, night vision amplifies existing light and cannot see through solid walls. Budget optimization involves setting a clear spending limit; a basic PVS-14 build typically starts around $2,000. For higher-end units, reaching out to professional builders like Goonin Gear can be worthwhile, especially if you need customized or high-spec options. Always check warranties and return policies when purchasing used gear. Finally, allocate funds for mounts and helmets—Chinese-made options offer savings—completing your financial plan without sacrificing essential quality.
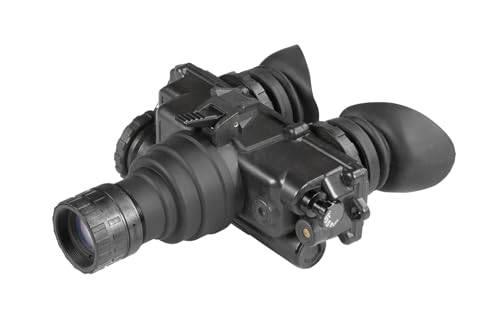
U.S. Military-Grade Night Vision Reliability: Crafted to meet the rigorous demands of the U.S. Military, the AGM PVS-7 night vision goggles deliver unmatched performance and dependability in the field. This rugged, battle-proven device is your trusted companion for secure and precise night operations

Gen 2+ Level 1 White Phosphor IIT Equipped with a high-performance P45 white phosphor tube, delivering crisp, high-contrast images in low-light and no-light environments.

AGM PVS-14 is a rugged, multi-purpose night vision monocular used globally in challenging environments.
Assemble Your Night Vision Camera and Display Housing
To assemble your night vision camera and display housing, your main goal is to create a secure, opaque enclosure that protects your components and ensures proper alignment. You can use a small ABS project box or a section of PVC pipe, both of which must be completely opaque to prevent light leaks. Seal all joints with silicone to maintain a light-tight environment. During assembly, ensure dust is removed from all interior components prior to assembly to prevent contamination. Mount your analog display centrally within the housing and secure it firmly using epoxy glue to prevent shifting. Design precise openings for the camera lens and screen, making sure they are adequately sized and positioned for optimal image clarity. Incorporate ventilation features, such as small vents or slits, to prevent heat buildup during operation. When attaching the camera, focus on careful calibration to align the camera’s view with the display accurately. The best modern commercial systems have largely moved away from red night vision due to its practical limitations. The same principle applies when choosing camera technology, where the debate between low glow versus no glow often centers on visibility and detection range. For thermal imaging projects, understanding the difference between these devices and the necessary thermal sensor is a crucial first step. For a versatile final housing, consider 3D printing a custom mount or repurposing a baseball cap to create a stable, portable enclosure that integrates all components seamlessly.

【Size】- Outer size of the project box: 7.87"x 4.72"x2.95"(200 x 120 x75 mm); Inner size of the project box:7.59" x4.4" x 2.67" (192 x112 x68mm)

【Size】: External Size of the project box : 3.9" x 2.4" x 1.0"/100 x 60 x 25mm(L*W*H) ,Internal Size of the project box : 3.78" x 2.2" x 0.91"/96 x 56 x 23mm(L*W*H)- -*Tips: in order to confirm the detailed installation dimensions, please refer to our detail image, which shows specific internal dimensions of the product. (Allowable Error: 2mm)

【Size】- Outer size of the project box: 7.87"x 4.72"x2.20"(200 x 120 x56 mm); Inner size of the project box:7.52" x4.37" x 1.89" (191 x111 x48mm)
Install and Position the Infrared Illuminator
To properly install and position the infrared illuminator, first attach it to your rail using a dovetail-to-weaver transfer piece. Loosen all fixing screws to mount the device, but avoid over-tightening to prevent whiteout and damage to the illuminator or mount. Remember to review any subscription terms for purchased components.
For infrared beam alignment, aim at a stationary object approximately forty to sixty yards away. Adjust the mount until the bright hotspot of the IR beam aligns with your reticle’s center. Start with a wide beam setting to locate the center accurately, then tighten the mount to focus the beam into a precise spot for targeted use. For long-range identification, ensuring proper thermal camera calibration is equally critical.
Consider wavelength selection based on your operational needs. Use 850 nanometers (nm) for a balanced combination of range and concealment or 940 nm for maximum infrared stealth, which is less detectable to others. Match the wavelength to your specific requirements and beam angle for optimal performance. Understanding the role of an infrared illuminator will help you maximize its effectiveness in your night vision setup.

Precision CNC Machined from 6061-T6 Aircraft Aluminum with a Matte Black Finish
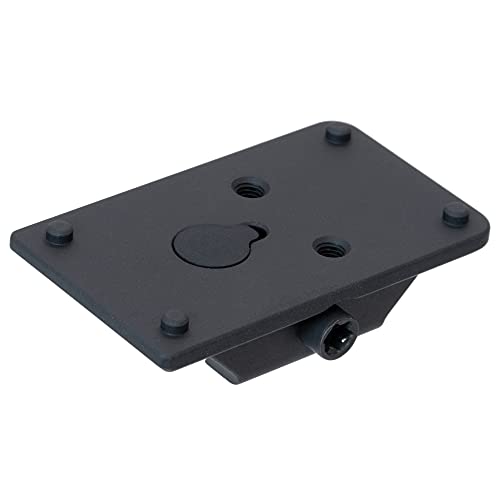
Low Profile 0.33" Saddle Height Keeps Height Overbore to a Minimum

CHECK YOUR FIT: For compatible non-MOS Glock rear sight dovetails; excludes MOS and Glock 44. Fits Holosun 407K/507K, EPS series; Osight K/S/SE; Shield RMS/RMSc; SIG RomeoZero; Crimson Trace CTS-1550; JPoint. Osight K/S/SE models use the EPS-labeled screw kit.
Wire the Power Supply for Safe Operation
To wire the power supply safely, start by selecting a reliable battery, such as a 3V CR123A or lithium AA, ensuring the voltage does not exceed 3.5V DC to protect the image-intensifier tube. For optimal performance in various conditions, understanding the generation differences in night vision technology can help you select compatible components. Always double-check the polarity of the battery before connecting the clips; reversing polarity can cause damage. When soldering high-voltage connections, verify the orientation of each component to prevent miswiring. Install the battery with the correct polarity marked on the device, matching the positive and negative terminals precisely. The principles of thermal imaging technology rely on detecting heat signatures rather than amplifying light, which is a fundamental difference from your night vision goggles. These precautions help ensure that when power is applied, the tube cathode emits a suitable green glow, confirming the connection is both safe and functional. Managing power carefully is important, much like considering the thermal drone costs when selecting a professional-grade component.
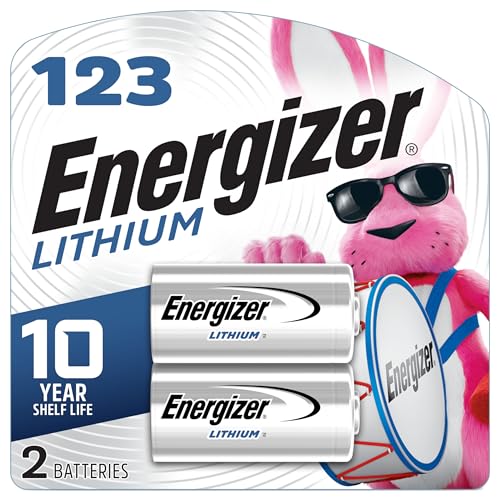
2 pack of Energizer 123 Lithium Batteries

One 6-pack of CR123A Lithium 3-volt batteries with 1,550mAh capacity NOT RECHARGEABLE

Mount Your Night Vision Goggles on a Headband
Mounting your night vision goggles on a headband provides a secure and comfortable fit. Start by choosing an adjustable, durable headband with a reinforced center to support the weight. Select a compatible mount bracket along with a J-arm or flip mechanism suitable for your device, ensuring the industry-standard footprint is matched for proper fit. This is important as ensuring hardware compatibility is just as crucial when selecting a thermal camera app for your smartphone. Secure the bracket firmly to the top of the headband with screws, making sure it remains stable and does not move. Attach your night vision device to the mount bracket, ensuring it is properly aligned and securely fastened. This secure attachment is similar in principle to the quick connect feature on some outdoor gear. To counterbalance the front-heavy weight, add a counterweight to the rear of the headband. For activities like night driving, this stability is essential to maintain clear peripheral awareness on the road. Test the balance by placing the assembly on your fist; it should stay level and not tip forward. Proper mounting ensures stability during movement and keeps the optics aligned with your eyes.
Perform a Final Safety and Function Check
To ensure your night vision goggles are fully operational, perform a thorough safety and function check. Start by inspecting the hardware integrity and seals; look for cracks in the housing that could weaken the structure and check that O-rings are properly seated to prevent moisture ingress. Tighten all mounting screws to ensure stability.
Next, validate the electrical connections. Confirm the battery polarity matches the device specifications, and verify that the voltage is within the recommended range. Inspect cords and switches for any signs of damage or corrosion that could impact functionality. This meticulous verification is similar to monitoring a device’s pending camera check status, ensuring no underlying issues compromise performance.
Then, assess optical performance. Clean the lenses with a soft, lint-free cloth and check for smudges or scratches. Adjust the diopters for a sharp, uniform image without distortions, ensuring clear visibility.
Calibrate the optical alignment by setting your inter-pupillary distance and eye relief according to your comfort. Proper alignment reduces eye strain and enhances image clarity.
Finally, execute a functional test by powering on the goggles and testing all controls. Observe startup sequence accuracy, responsiveness of controls, and overall image stability. Performing these safety protocols systematically, and integrating them into your routine maintenance, guarantees your goggles will operate reliably and safely before each use. A thorough function check should also include evaluating image clarity and stability across different conditions, as this is a primary concern for any optical device. Be aware that night vision devices, including covert surveillance cameras, can emit a faint glow or infrared signature that may be detectable in dark environments.
Test Your Night Vision Goggles in Total Darkness
Testing night vision goggles in total darkness requires an active infrared source because, without photons, standard goggles are effectively blind. An 850 nm illuminator is commonly used to provide the necessary IR light, allowing you to evaluate your device’s performance. Conduct your test in a sealed, underground room to ensure true darkness, which is essential for accurate luminance measurement, mimicking the operational conditions verified in military tests. Confirm that your infrared calibrator’s output matches your goggles’ sensitivity; this step is critical to avoid false readings. Adjust the objective lens for infinity focus and set the eyepiece to zero diopters for consistent imaging. Use a photometer to measure the output luminance, then compare it to known low light levels, typically around 10⁻⁵ foot-lamberts. This comparison allows you to calculate the brightness gain of your night vision goggles with precision.
Troubleshoot Common DIY Night Vision Issues
Issues in your DIY night vision build are common even after thorough testing. Start troubleshooting with the power supply by measuring the voltage of your batteries using a multimeter. Even new batteries can be faulty or drained. Clean corroded contacts with isopropyl alcohol and ensure correct polarity to avoid damaging your circuit.
For the optics, always clean lenses with a microfiber cloth to prevent scratches. Avoid using paper towels, which can damage the lens surface. Make sure the lens cap is removed; it’s a simple oversight that causes total failure. To verify the infrared illuminator is working, check if it emits a glow using your smartphone camera. If your image remains completely black through the night vision tube, even when pointed at a dim light, the component is likely faulty and should be replaced.