How Much Is a Thermal Camera?
Wondering how much a thermal camera costs? Prices can vary widely, from under $200 for smartphone attachments to more than $10,000 for high-end industrial units.
Your budget depends on what features matter most, like image clarity or temperature precision.
Keep reading to find out what fits your needs and how to choose the right one.
How Much Does a Thermal Camera Cost? The Quick Answer
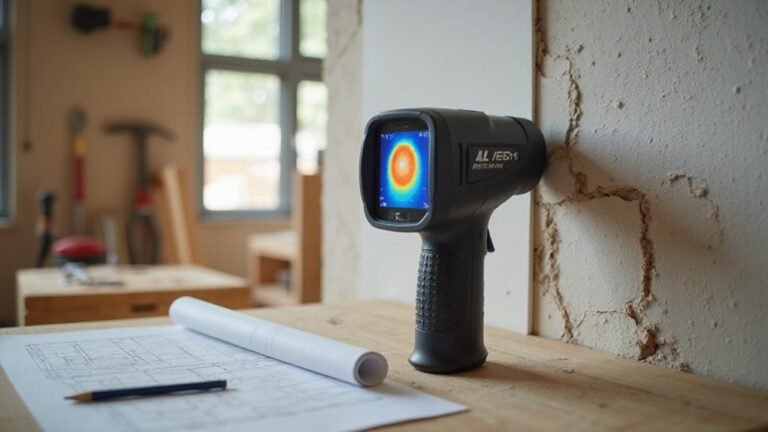
Thermal camera prices vary widely, typically ranging from around $100 to over $10,000. For casual users, smartphone-compatible models cost between $150 and $400. Handheld devices used in electrical or HVAC work generally fall into the $500 to $ $2,000 range. Industrial or scientific-grade thermal cameras, which demand higher resolution and detection range, often cost between $1,500 and $12,000. This parallels the specialized nature and regulation of other optical devices like night vision goggles. Advances in sensor technology have made entry-level units more affordable, whereas specialized options like drone-mounted sensors can be significantly more expensive. The primary factors influencing cost are your required resolution, detection range, and application complexity, such as a game camera’s detection circuit. With the right tools and parts, you can even build a basic one yourself as a DIY project.
Understanding the Four Main Types of Thermal Cameras
There are four main types of thermal cameras: cooled, uncooled, long-wave infrared (LWIR), and mid-wave infrared (MWIR). Cooled models offer high sensitivity suitable for scientific and military applications but require bulky cryocoolers, making them less portable. Uncooled cameras, which use microbolometers, are more compact, affordable, and durable, making them popular in industrial and security settings, and you can often find better deals on them by prioritizing core features over unnecessary extras. LWIR cameras operate effectively across various weather conditions and are versatile for firefighting and outdoor activities. MWIR cameras detect shorter wavelengths and provide higher resolution, ideal for high-temperature industrial monitoring. DIY enthusiasts can incorporate uncooled thermal cameras into custom builds like thermal drones using the right tools and components. When deciding between thermal imaging and night vision, it’s important to know that thermal cameras detect heat signatures rather than amplifying light. Your choice depends on balancing the level of sensitivity needed, the wavelengths to be detected, and your budget constraints.
What You Get in the Entry-Level (Under $500) Category
Under $500 thermal cameras are basic tools suitable for initial detection rather than detailed analysis. They typically feature phone-attached accessories or simple handheld units with resolutions ranging from 80×60 to 128×96 pixels. These cameras are effective for spotting obvious heat leaks, HVAC issues, or electrical hot spots, but users should be aware that their images may sometimes display artifacts or unusual visual noise similar to what can appear on night vision cameras. Their temperature measurement range usually extends from -4°F to over 750°F, with an accuracy of plus or minus 3 to 5 percent. The core technology uses infrared radiation detection to create a visual heat map.
At this price point, focus on sensor durability and warranty coverage, especially from reputable brands like FLIR or Seek. Many options start around $200, making them accessible while still providing reliable performance. Some affordable models, such as the Mastfui, include advanced features like adjustable emissivity settings for more accurate readings on different materials. Keep in mind, these tools are not designed for fine diagnostics but are useful for visualizing thermal patterns during general troubleshooting tasks.

【GW192A Turn Your Smartphone into a Thermal Camera】Android/iphone Camera Plug-and-Play APP - (THG Start), Easily convert your smartphone into a high-performance thermal imager with USB-C plug-and-play—no batteries, no pairing, just scan. This iOS Thermal Master tool brings professional-grade thermal imaging to your pocket. Compatible with iPhone 15/16/17 series phones.

Super Resolution Enhancement: The Flagfront YXI96 thermal camera is equipped with 240x240 super-resolution imaging technology, providing clearer images and capturing more details; A high frame refresh rate of 25Hz ensures a smooth inspection experience
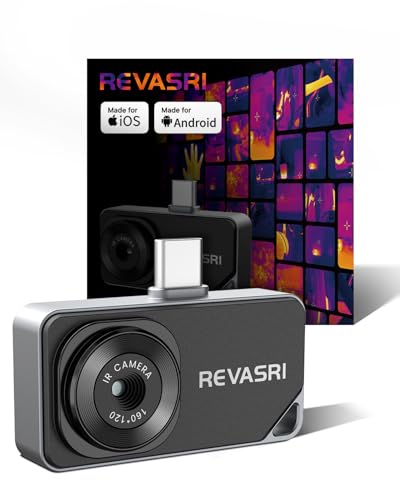
IOS & Android Compatibility: The REVASRI thermal camera is compatible with USB-C interface phones, tablets, and computers, and is suitable for IOS, Android, and Windows systems. Download the application by scanning the QR code in the user manual. Simply download the dedicated 'Camera +' APP application to achieve instant plug and play operation
The Sweet Spot for Serious DIYers: Mid-Tier ($500 to $1,500)
Mid-tier thermal cameras priced between $500 and $1,500 provide serious DIYers with professional-grade tools that dramatically improve diagnostic accuracy. These cameras typically feature high-resolution infrared imaging, with sensor resolutions around 256×192 or 320×240 pixels. This level of detail makes it easier to identify electrical faults, insulation gaps, or moisture intrusion, even in complex or cluttered environments. Enhanced sensitivity and reliable thermal calibration are standard in this range, allowing you to detect subtle temperature differences consistently. This is because they capture infrared radiation, the invisible heat signature emitted by all objects. Many models also include features such as WiFi for live streaming, image fusion modes for overlaying thermal data onto visual images, and longer battery life to support extended use. For optimal performance in the field, understanding proper scope calibration and zeroing is essential. Understanding the underlying technology helps buyers appreciate why these mid-tier devices offer such a significant leap in capability. While brand options and specific features vary, investing in a mid-tier thermal camera means gaining a standalone device capable of professional-quality diagnostics. It transforms your home inspections or partial professional work by offering the clarity and functionality that make troubleshooting faster and more accurate.

Image Enhancement Technology: The VEVOR thermal imager adopts TISR enhancement technology, upgrading the original IR resolution of 160x120 to a super resolution of 320x240. With a 25Hz refresh rate, ≤40 mK thermal sensitivity, and a wide 50°x37.2° field of view, combined with image sharpening algorithms and a high-performance AI chip, its 2.8-inch LCD screen captures and displays heat details with greater clarity

[Thermal Clarity Enhancement] Designed with a 2.8-inch 320×240 LCD screen, the HT280 thermal imaging camera displays clearer, more detailed thermal images. It enhances thermal image resolution to 260×260 using TISR technology for greater detail(Opening the TisoView in the settings will get more clear images). With a thermal sensitivity of 50 mK and a frame rate of 25 Hz, it delivers accurate, smooth images, making it an essential tool for building inspections, HVAC troubleshooting, electrical inspections, and vehicle maintenance.

【Advanced Thermal Clarity Technology– See Problems More Clearly】 Find hidden heat sources before they turn into bigger problems.The 2.8 inch 320×240 LCD provides a clear on-screen view, helping quickly locate hot spots, cold areas, heat loss, electrical issues, HVAC problems and more.The thermal imaging camera adopts TISR(Super Resolution) technology, enhancing thermal image resolution up to 240×180, while the 25Hz refresh rate delivers smooth and clear real-time thermal imaging.
Do You Need a Professional-Grade Thermal Camera?
You need a professional-grade thermal camera when your infrared thermography tasks demand strict industry standards. This includes building inspections that require detecting minute temperature differences, often just a fraction of a degree Celsius. Electrical diagnostics demanding an accuracy of ±2°C also necessitate calibrated, high-performance tools to ensure reliable results. For predictive maintenance involving small components like motors, a low NETD (Noise Equivalent Temperature Difference) value is essential—ideally below 50 mK—and a thermal resolution of at least 320×240 pixels to resolve fine details.
Compliance with regulations such as NFPA 70B further requires professional-grade cameras to meet calibration and accuracy standards. High-temperature industrial processes, defense applications, or scenarios involving radiometric video for dynamic thermal analysis clearly benefit from advanced features and precise measurements. Proper evaluation and operation are also critical, as device effectiveness and safety depend heavily on user training aligned with standards like NFPA 1930 for thermal imaging devices. The core technology enabling clear vision in darkness, much like modern thermal imaging, evolved from early military devices such as night vision goggles. For complex devices, a hard reset can often restore core functionality if advanced settings become corrupted. When selecting any imaging device for low-light conditions, such as for security or wildlife observation, understanding the trade-offs between analog and digital systems is crucial for performance expectations. In these cases, investing in a professional-grade thermal camera ensures safety, accuracy, and regulatory compliance, making it an indispensable tool for critical inspections and diagnostics.

C8: Handheld IR camera, 320x240 resolution and 35° Horizontal Field of View (HFOV) increase the number of pixels on target, enhancing thermal image clarity

iOS and Android Compatibility: The P1 thermal imager supports all USB-C smartphones and computers, including iOS, Android, and Windows. For iPhones with a Lightning port, a Type-C to Lightning adapter is required (sold separately). App name: Thermal Master.

【Enhanced Thermal Clarity for Precise Inspections】The RT280 handheld thermal imaging camera features a 2.8-inch 320×240 LCD screen for smooth, detailed thermal visuals. Equipped with TISR technology, it enhances thermal image effective resolution from 120×90 to 240×180, enabling the capture of tiny temperature differences. Its 50°x 38° FOV and 25Hz frame rate deliver clear, smooth images, making it ideal for home inspections, electrical checks, mechanical fault diagnosis, and automotive engine inspections.
How to Match a Thermal Camera to Your Specific Use Case
To match a thermal camera to your specific use case, start by clearly defining your environment and targets. For indoor electrical inspections, a camera with high spatial resolution and precise temperature sensitivity is crucial to detect small differences, as it relies on the fundamental principle of infrared radiation detection. Outdoors, especially for building envelope assessments, a wider field of view and higher durability are more important. Distance affects your choice of lens and resolution; longer distances require a camera with a higher detector resolution to capture detailed images. Humidity, dust, and harsh weather influence the camera’s durability—look for models with robust enclosures and high Ingress Protection (IP) ratings.
Also, consider the operational temperature range of the detector. Extreme environmental conditions can accelerate wear and impact accuracy, so selecting a camera with proven thermal stability is essential. For perimeter security in large areas, consider bullet cameras designed for outdoor applications with features like intrusion detection. Finally, confirm that the manufacturer supports regular thermal calibration. Routine calibration maintains measurement accuracy over time, ensuring you get reliable and actionable data tailored to your inspection tasks.

DVR CCTV BULLET SECURITY CAMERA WITH ACTIVE DETERRENCE: Provide extra surveillance to your home or business with 1080p Full HD clarity; Sensor Spotlights deter intruders and provide Color Night Vision up to 32ft and Black and White up to 100ft

ULTRA HIGH DEFINITION FOOTAGE: See more detail than ever before when you add this camera to your Swann Professional NVR-8580 Series 4K wired security system. Equipped with 4K Ultra HD video, this camera allows you to zoom into essential features like facial detail, license plates, and more. It also features color night vision in low light and the ability to see B&W up to 150ft in total darkness and 200ft in ambient light.

FULL HIGH DEFINITION FOOTAGE: Combine the PRO-1080MSB camera with a compatible DVR to see faces, license plates and more in rich 1080p full HD. The camera's sturdy construction gives you 24/7 protection in rain, snow, heat and all year round. With a 90 degree viewing angle and night vision up to 100ft in total darkness and 130ft with ambient light, no blind spot will go unnoticed. Some compatible series are: DVR-4580, DVR-4980, DVR-5580 & more.
What Drives Thermal Camera Prices: Resolution and Sensitivity
Resolution and sensitivity primarily drive the cost of thermal cameras. Resolution, such as 640×480 pixels for professional use, determines the clarity of the image. Achieving higher pixel counts requires advanced manufacturing techniques like complex lithography, which significantly increases raw material costs and production complexity. Sensitivity, measured as NETD (Noise Equivalent Temperature Difference), indicates the camera’s ability to detect subtle temperature differences. A low NETD, such as 30 millikelvin or less, demands precise sensor calibration and often involves costly cooling systems to maintain optimal performance. Interestingly, the choice of a green phosphor screen in night vision goggles was driven by human visual perception, as the eye can discern more shades of green than any other color. For best results, proper scene temperature range selection is a critical step during camera setup to ensure accurate readings. Cameras that combine high resolution with elite sensitivity are particularly expensive because producing such sensors involves extremely demanding fabrication processes, similar to the advanced materials and engineering required for ballistic helmet construction. When you pursue improvements in both resolution and sensitivity together, costs increase exponentially due to the compounded precision required in manufacturing and sensor calibration.
Thermal Camera Kits vs. Standalone Units: What’s Included?
Thermal Camera Kits vs. Standalone Units: What’s Included?
If you’re comparing thermal camera kits to standalone units, the main difference lies in what’s included out of the box. A kit consists of a core module with the infrared detector, a specialized lens, and processing boards. You’ll need to supply your own display, power source, and host system to complete the setup, making it ideal for custom integrations such as robotics or specialized kiosks.
In contrast, a standalone unit is a complete, ready-to-use device. It typically features an integrated display, a built-in battery, a trigger button, and often additional tools like a laser pointer. This makes it instantly portable and suitable for on-the-spot inspections or field use without extra assembly. While kits offer flexibility for tailored applications, standalone models provide a full, report-ready workflow, similar to professional infrared thermometers. They often eliminate the need for supplementary components like thermochromic paint for validation, streamlining the inspection process from start to finish. Modern standalone models often feature higher thermal resolution for sharper detail, with newer units reaching up to 256×192 pixels.

3.5'' 640×480 IPS: This thermal imager features a 2MP visible light camera and a 3.5" 640×480 IPS display for exceptional clarity. With upgraded X³ IR technology, it boosts thermal resolution from 256×192 to 512×384. This handheld thermal camera supports a smooth 25Hz refresh rate, and offers ultra-fine 40mK sensitivity—delivering faster, more detailed inspections.
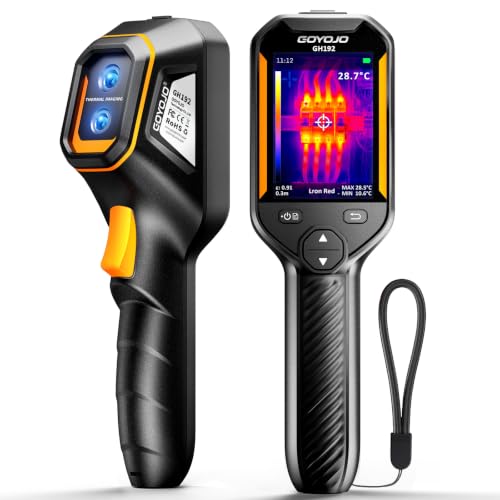
Dual Light Fusion Imaging: GH192 240x240 Thermal Imager is equipped with a 2MP visible light camera and an infrared camera,Instantly outlines target objects upon activation, a 2.8" 240×320 IPS display, and a 25Hz frame refresh rate. It enables inspections with faster response and more detailed results. [Note:Enable in settings before exporting images "File Transfer"]

UNIVERSAL USB-C COMPATIBILITY: As an upgraded version of TC002C, the TOPDON TC002C Duo now works seamlessly with all USB-C smartphones and tablets (iOS, Android & Windows), ensuring compatibility with the latest Apple & Android devices. Note: Not compatible with Mac device or Android 16 device temporarily
Smartphone Thermal Attachments: Are They Worth It?
Smartphone thermal attachments provide an affordable way to access thermal imaging without investing in a dedicated camera. Entry-level models like the FLIR ONE Gen 3 typically cost between $150 and $250. These models offer basic resolution suitable for DIY projects, home inspections, and educational purposes. Premium attachments, which can cost up to $400, deliver improved detail and image clarity, making them better suited for more demanding tasks.
These attachments are valued for their portability and ease of use, allowing you to attach them directly to your smartphone for quick, on-the-go inspections. For example, modern smartphone attachments can conveniently detect temperatures up to 16.4 feet away, enhancing their utility for non-contact inspections. However, they do have limitations. They tend to drain your phone’s battery quickly, reducing overall battery life especially during extended use. Their resolution is generally lower compared to standalone thermal cameras, which may hinder detailed analysis for professional work.
Moreover, to maintain accuracy, it’s important to perform regular thermal calibration, especially if you’re working in environments with extreme ambient temperatures. Ambient temperature variations can impact measurement reliability. Ultimately, whether these attachments are worth it depends on your specific needs: casual users or hobbyists may find great value, while professionals may prefer standalone devices with superior features and higher performance.