How to Build Night Vision Goggles: A Complete Guide
Wondering if you can build night vision goggles yourself? While you can create a basic simulator for around $20, true night vision uses special tubes that amplify faint light to see in total darkness.
Cheaper camera setups often rely on active infrared lighting, which isn’t the same. The difference between a toy and a reliable tool comes down to your choice and understanding what’s truly involved—so let’s break it all down.
Is True Night Vision Worth It, or Is a Simulator Good Enough?
True night vision is worth it if you need genuine low-light capability. It amplifies ambient light through an image intensifier tube or digital sensor, providing a scene that closely resembles natural viewing conditions. In contrast, a simulator simply converts daytime images into grayscale or green tones, offering an approximation rather than an authentic visual experience. This difference in visual realism significantly impacts detection accuracy; true night vision allows you to distinguish subtle contrasts, depth, and movement—critical for identifying targets at night or in low-light environments. A simulator may be useful for training or UI previews, but it cannot replicate the subtle nuances necessary for real-world identification. If your goal is to interpret actual imagery where shadows, highlights, and depth matter, investing in true night vision equipment is the only way to ensure reliable low-light performance. Unlike thermal imaging, which detects heat signatures, true night vision relies on ambient light amplification to render visible details. A trail camera operates on a similar principle, using ambient light and infrared sensors to capture clear images in low-light conditions for outdoor monitoring. Understanding how these devices function can help buyers select equipment that matches their specific monitoring needs.
The Two Essential Part Sets: Camera vs. Tube DIY Builds
The choice between camera-based and tube-based builds for DIY night vision goggles hinges on your priorities and budget. Camera builds use analog low-light cameras connected to mini displays, often requiring an IR illuminator for complete darkness. These setups tend to produce black-and-white or green-tinted video, sacrificing color accuracy. Image stabilization depends on the camera’s electronic features, so shaky footage can cause blurring and loss of detail. For a camera-based build, essential components like the Cadex Infra FPV camera require a minimum 3S LiPo battery to function, altering your power supply needs. Consumer savings tips often suggest starting with a simpler camera build to avoid high initial costs. For those new to the technology, learning how to focus and adjust a thermal clip-on can improve image clarity during use. For a camera-based build, it is crucial to understand the complete parts list of tools and sensors required, as outlined in a thermal scope DIY guide.
In contrast, tube builds utilize an image intensifier tube for true optical amplification, providing superior low-light performance without the need for IR lighting. They generate a green monochrome image, which is typical for most tubes, and image stabilization is natural, thanks to the direct optical pathway. However, tube builds are significantly more expensive because they rely on specialized hardware. Additionally, they demand more precise assembly and calibration.
The $20 Budget Build: Can You Really See in the Dark?
A $20 budget build can give you a night-vision-like view, but with limitations. You’ll combine a low-cost camera with an infrared flashlight to illuminate your scene. This setup isn’t true image intensification; it relies entirely on infrared illumination to produce a visible image. The camera’s low-light sensitivity and the IR light’s power determine the image quality. Without the active IR source, you won’t see anything in complete darkness. The effective range is short because it depends on your IR illuminator’s beam, which can only reach so far. While you can assemble this for around $20 using a $10 camera and an IR flashlight, prices often increase once you add a display, power source, and housing. Remember, this setup provides a usable view only when the IR light is turned on, and it won’t match true night vision in terms of performance. Many budget cameras work for this because cheaper cameras often lack an IR filter, enabling infrared detection without modification.
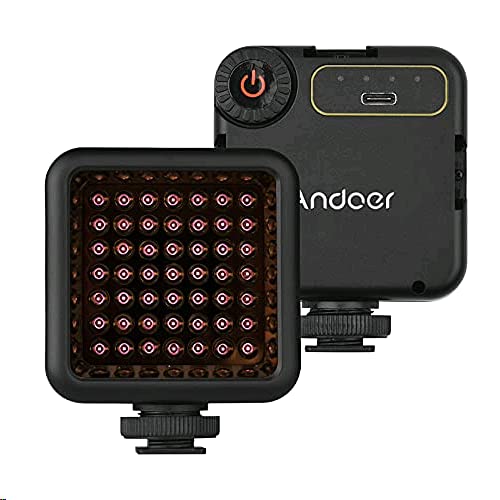
Versatile Lighting: Ideal for vlogging, video recording, and photography, this compact IR light ensures you're always ready to capture stunning footage in low-light conditions

【5K Cinematic Clarity & Versatility】 This digital camera captures stunning 5K/20fps videos (also 4K/60fps) and 64MP photos with a high-sensitivity CMOS sensor. Perfect for vlogging, travel films, podcast recording, family events, and interviews, delivering cinema-grade detail even in motion.
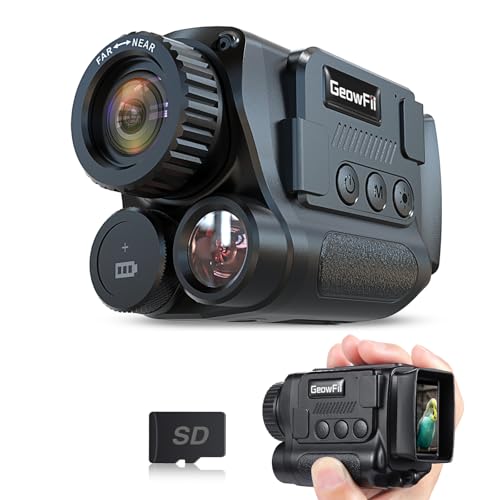
4K Upgraded & Practical—— GeowFiiTech Night Vision Monocular features a 4K version with a 25mm multi-coated lens, enhancing imaging for day and night use. With 4K video, 40MP photos, and essential functions, this monocular night vision meets outdoor needs effectively
The £200 Mid-Range Build: Analog Cameras and IR Light
Upgrading to the £200 mid-range build involves replacing a basic camera with an analog FPV camera paired with goggles or a monitor, resulting in a digital low-light or near-infrared view instead of true night vision. An example is the Caddx Infra, which detects near-infrared light but cannot see in complete darkness without additional IR illumination. To enhance visibility, you’ll need to add an IR LED array or an external IR flashlight to light up the scene. For distances up to 150 yards, built-in IR LEDs are usually sufficient, but for longer ranges, a more powerful IR light becomes necessary. All components are powered with a 4S LiPo battery and mounted in a custom or repurposed housing. This setup provides decent low-light visibility, though it remains a camera and IR solution rather than a true military-grade night vision system. A similar DIY approach uses a CH9226 CMOS sensor and removable IR filter to double spectral sensitivity into near-infrared for low-cost nighttime imaging.

HIGH RESOLUTION: 700TVL provides sharp and detailed images for clear FPV visuals.

Analog Camera with AI Image Enhancement Module: The Farsight combines an analog FPV camera with a dedicated AI image enhancement processor. The square module processes the camera signal to improve viewing clarity—it is not a video transmitter. A separate analog VTX is required for wireless video transmission

Smart Zoom For FPV,Take your FPV flying to the next level with smart zoom. Get crystal-clear, precise zoom adjustments—Whether you're racing or zooming in on faraway shots. AI-powered for smooth, real-time action.
Can You Build Real Night Vision With Gen 2+ or Gen 3 Tubes?
Yes, you can build real night vision with Gen 2+ or Gen 3 tubes, but the choice of tube is crucial. Gen 3 tubes are the top-tier option, offering approximately 20,000 times light amplification and a broader spectral response. This means you can identify targets out to 200 yards in complete darkness without needing an infrared illuminator. Gen 2+ tubes provide a more budget-friendly alternative, delivering dependable performance suitable for recreational use. However, keep in mind that phosphor color—green or white—does not significantly affect capability. The real factors influencing performance are tube architecture, sensitivity, and signal-to-noise ratio. Advanced lenses and image processing can improve clarity, but they won’t compensate for a poor-quality tube. Understanding the thermal detection principles behind these devices can help you evaluate how they differ from image intensifiers. Ultimately, selecting a Gen 3 tube ensures your night vision build performs well in low-light conditions, whereas a Gen 2+ may leave you with a less satisfying glow. Cost-effective tubes work well for their price, but they do not replace higher-end options, avoid sacrificing quality for accessories or housing. For context, just as cost-effective performance is critical when choosing between trail cameras, the same principle applies to selecting a night vision tube. If you use a thermal device instead, you can connect it to your phone by following the AGM Thermal pairing instructions provided in the device manual.
How to Pick a Housing That Fits Your DIY Night Vision Build
Choose a housing that supports secure helmet mounting and accepts standard glass without major redesign. Ensure the internal dimensions of the housing accommodate your night vision tube’s size—consult your tube’s datasheet for precise measurements. Compatibility with common glass optics is essential; test fit the lens before purchase to prevent costly modifications later. A true 1X magnification helps keep the device usable as a monocular, maintaining a clear view without distortion. Verify the mount interface matches your intended mounting system to ensure stable attachment. Testing compatibility beforehand minimizes the risk of losing alignment and having to rebuild your setup from scratch. Housing designs like the three-dimensional printed options from “Toto magfed” often include features such as a single CR123A battery with 40-hour life and 1/4×20 threads, so check those specs against your tube and mounting gear before committing. When testing image clarity, a green light hog hunting approach can serve as a reliable reference for verifying low-light performance. Understanding night vision camera orbs can help buyers avoid false positives when testing image clarity in low-light conditions. For additional guidance, reviewing top night vision binoculars can help you compare commercial housing features that support similar mounting and optical standards.

No need to purchase a J-arm to be compatible with "Dovetail"

Superior Material:The helmet bracket is made of high-quality aluminum alloy with high oxidation resistance. The surface is color-locked,so it will not fade. The special process makes the surface smooth and work smoother.

Dual-Mode Stress-Release Design – Innovative bracket system allows the NVG mount to detach under stress (e.g., impacts) or securely lock for stability. Perfect for tactical ops, airsoft, or high-risk missions where safety is critical
How to Wire Power, Batteries, and Switches Without Blowing Anything Up
Use proven wiring techniques to safely connect your power source, batteries, and switches. Run your camera and display components from the regulated 12V rail to ensure stable operation. For the IR LEDs, feed them directly from the battery pack to minimize conversion losses and maximize brightness. Incorporate a series resistor of 5Ω, rated at 5W, in the IR LED branch to limit current and protect the LEDs from overcurrent. Additionally, include a reverse-voltage protection diode on the main line to prevent damage if the power supply is connected backward. Wire two switches: one for controlling the main system power and another dedicated to turning the IR LEDs on or off. Clearly label positive and negative leads with red for positive and black for negative. Insulate every joint thoroughly with electrical tape to prevent shorts. Before applying power, always test for continuity at each connection with a multimeter to confirm proper wiring. Skipping this step risks blowing your components or creating dangerous shorts. Connect your 7 infrared LEDs in series with a 100Ω resistor to keep them powered from the boost converter. This approach mirrors how a thermal imager uses infrared energy to detect temperature differences, ensuring your system components handle the current safely.

Product Description: 12V 2A power supply 5.5mm x 2.1mm & 2.5mm plug adapters.
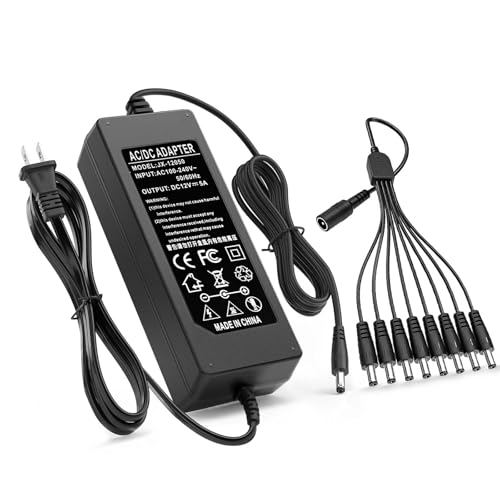
1.【Compatibility】12V 5A CCTV Cameras Power Supply widely used in home and office such as led strip lights, RGB & Single Color 2835 3528 5050 5630 5730 DC12V Low Voltage Flexible LED Rope Strip Lights, LED Ribbon Tape Light, LED Modules, LED Cabinet Lamps, Under Counter Lighting, external harddrive, telescope motors, lcd monitors, Switch HUB, Led Strip, LCD Monitors, audio amplifier, 3D Printer, Wireless Router, Hub, 12 Vac ADSL and Other 12 Vdc Devices

[ Security Camera Power Supply Product Specification: ] 12V 5A power supply Worldwide Input voltage: AC 100-240V, 50-60Hz; Output voltage: DC 12Volt 5Amp 60 Watt Max. Power polarity: positive inside and negative outside. 12Volt power supply cord and Bending Resistance is not Easy to Damage, with eight power lines can supply power for multiple electronic devices. Very suitable for closed-circuit television and video cameras in home or office
The 4 Hard Limits of Every DIY Night Vision Build
Sensor sensitivity limits your DIY night vision’s effectiveness. Most consumer-grade sensors require active infrared (IR) lighting to see anything in complete darkness. Without IR illumination, the sensor’s ability to capture images drops drastically or becomes impossible. Even with IR, the effective range typically maxes out around 15 meters in open terrain, meaning you won’t get clear images beyond that distance. Improving sensitivity involves upgrading to more advanced sensors, but these are often expensive and harder to integrate into a DIY build. Ultimately, sensor limits define how well your device can perform in total darkness and how far it can see. For comparison, thermal cameras detect heat rather than reflected light, offering passive night vision even in absolute darkness, but they generally lack the detail for facial recognition. Unlike thermal systems, these DIY builds cannot see through smoke because the IR light scatters off particles, severely reducing visibility. Building a thermal alternative requires sourcing a microbolometer core, which is the key component that measures temperature differences without any external light source.